A free DIY steel wallet device for securely storing Bitcoin and other cryptocurrency seeds Important: Decide for yourself if you trust your skills and the device you made: I do not give any warranty and reject any liability. It should be seen as a fun project that saves some money. My guess is that if you have all the tools and calculate how much one DIY_SteelWallet would cost you it would be approx. 5€ or even less expensive. Considering the possible need of multiple steel wallets its far less expensive than commercially available product but not less secure (I hope) and quick and easy to make.
Parts of the following information were taken from the Bitcoin Wiki and partly adapted for this description. According to the Bitcoin Wiki there is a best practice when it comes to storage of Bitcoin. There are good and bad wallet ideas The best way to store bitcoin is to either use a hardware wallet, a multisignature wallet or a cold storage wallet. One should have the wallet create a seed phrase, write the Seedphrase down on paper and store it in a safe place (or several safe places, as backups). This is where a steel wallet can come into play:
A seed phrase, seed recovery phrase or backup seed phrase is a list of words which store all the information needed to recover Bitcoin funds on-chain. BIP39 is the most common standard used for seed phrases today. Anybody who is in posession of the phrase can transfer the bitcoins, so it must be kept safe like jewels or cash. For example, it must not be typed into any website. A password can be used to create a two-factor seed phrase where both "something you have" plus "something you know" is required to unlock the bitcoins. This also allows the backup to be split between two different locations, so that if only one location (the seed or password) has been compromised, the Bitcoins cannot be accessed immediately, as long as the second part (the password or seed) is still secure and unknown to the attacker.
Most people write down Seeds and phrases on paper but they can be stored in many other ways such as memorizing, engraving or stamping on metal. There are also Methods that are not recommended. Seed phrases can however be stamped or engraved into metal which is significantly more durable than paper. Metal backups are recommended if the threat model involves fire, water, extremes of temperature or physical stress. Those metal devices are often refered to as steel wallets.
Jameson Lopp provides an overview over some of the commercially available devices, which he has tested and evaluated. Commercially available devices cost between $20 and over $300, depending on the features, quality and finish. Depending on whether only a seed or a seed plus password is used, two wallets are necessary for a complete backup. If two or three backups are to be kept in different locations, a plurality of wallets is required accordingly. As a student, I see a problem at this point: the whole business of storing bitcoin securely is going to be an expensive endeavor. I would like to provide a solution to this problem: A DIY Steel wallet, which is as robust as possible, featurerich, easy to make yourself and inexpensive, even if several wallets are needed.
This is the result we want to achieve:
A steel wallet that does not only protect our Seed from destruction but also protects it from third parties views in a tamper evident way.
- resistant to heat, corrosion and mechanical damage
- metal plate visibility protection through 3d printed case
- integrated tamper proof seal to enable the detection of a potential security risk
- cheap and easy production (I guess it is approx. 5€ or even less expensive)
Some Tools and materials are required for the DIY_SteelWallet that are listed in the following paragraph:
Tools:
- A 3d printer or access to a 3d printer: for making the case. You might want to use a 3d-print service if you don have access to a printer.
- A drill with metal drills (1.5 or 2mm): For attaching the metal plate, case and tamper proof seal
- Letter Metal Stamps (60 * 6 * 1.5mm work very well): For engraving the seed into the metal plate
- A hammer
- A sturdy surface to hammer onto
- Personal protective equipment (for your safety!)
Material:
- Sufficient ammount of filament for the 3d printer.
- Metal plate max. 50 * 70 * 1.5mm (a thinner metal plate will also work; See below for material choice: titanium or stainless steel might work best)
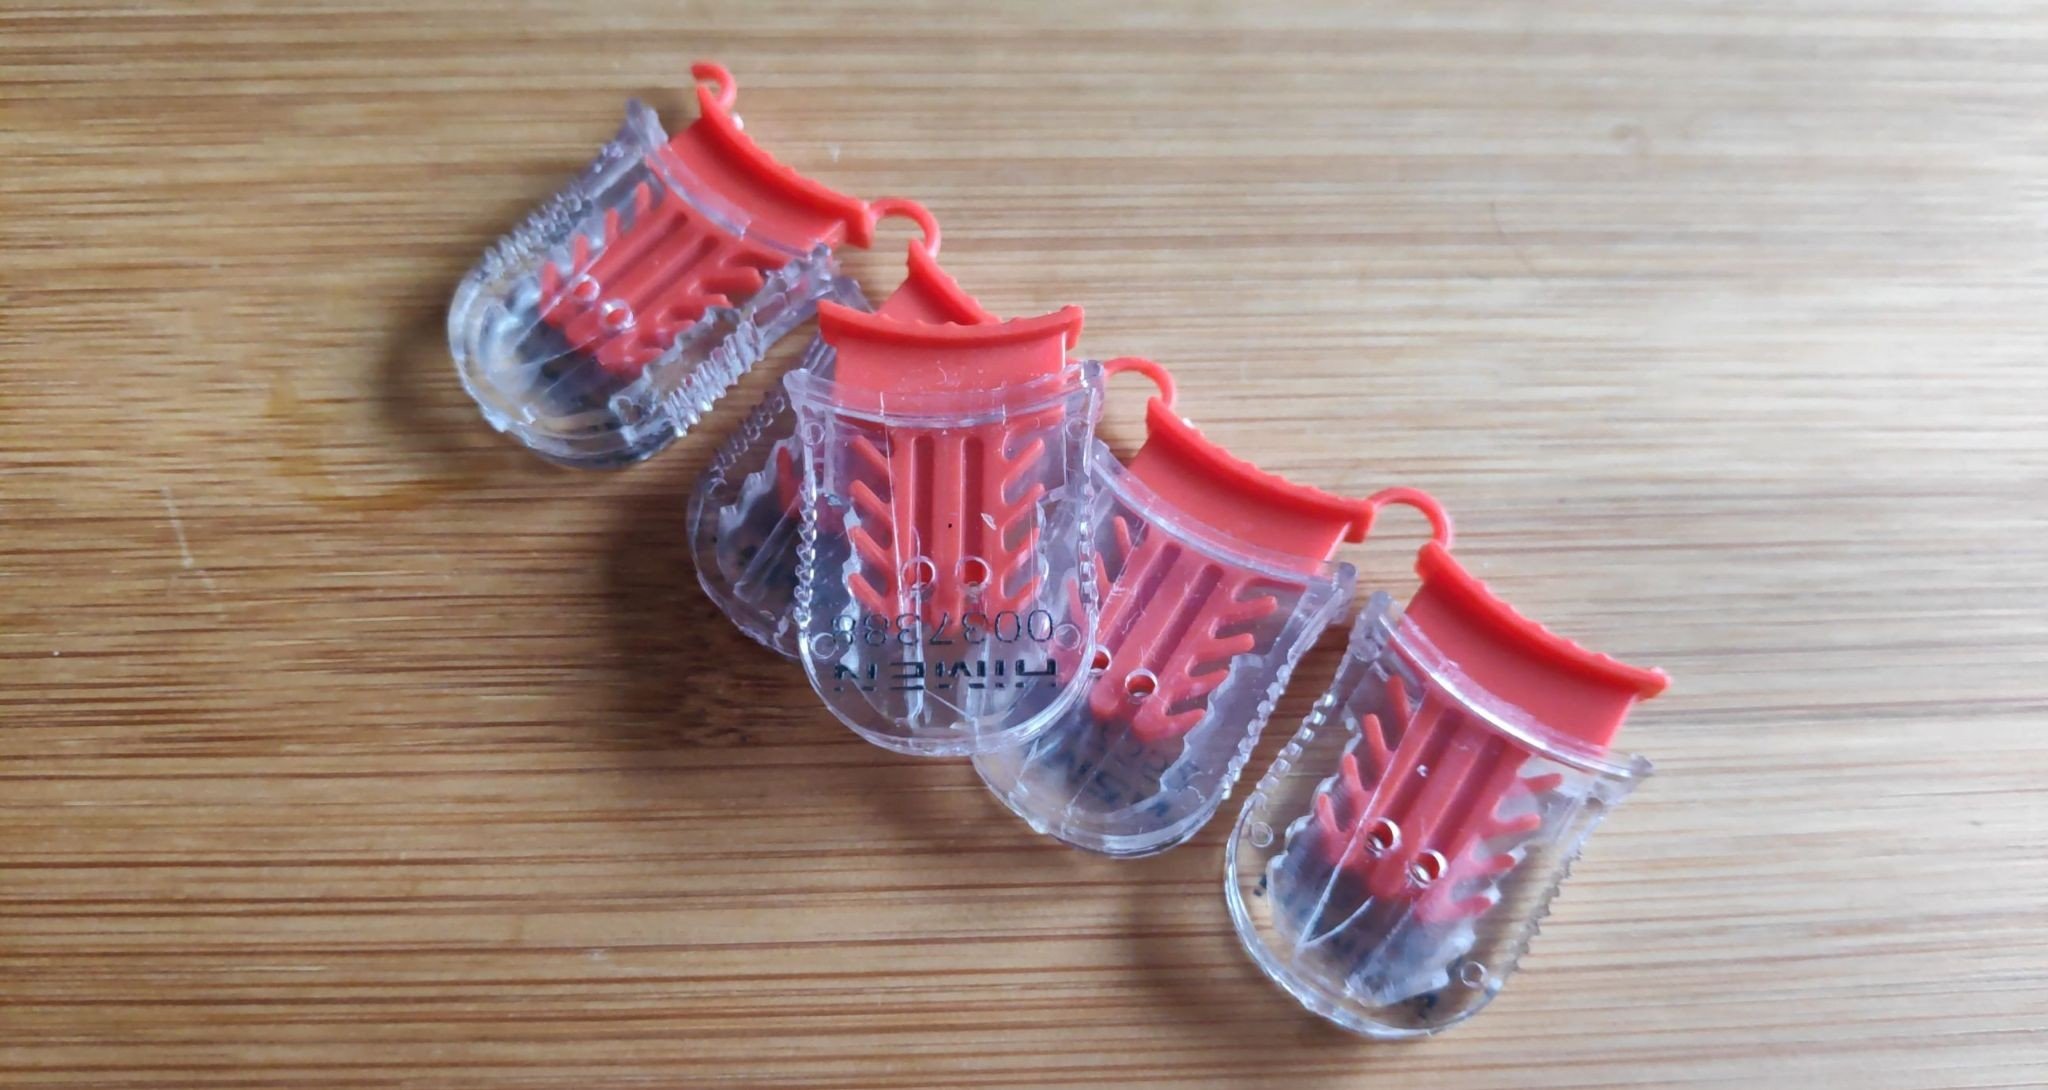
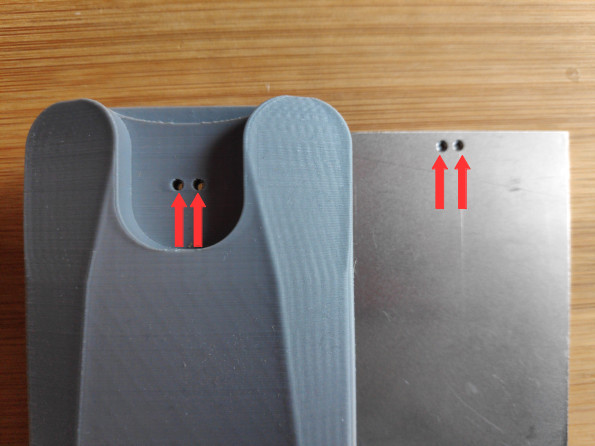
- tamper proof seals (preferably from HIMEN: "AWS-06x7") The case is designed so that the HIMEN AWS-06x7 fit perfectly. Other seals can also be used maybe with another variant of the case if required (different drills might be required then).
See a picture of the recommended seal below:
Optional
- A metal saw to saw the metal plates
- Additional stick on tamper proof seals
The case only serves to avert curious glances from the metal plate. Together with the tamper proof seal, tampering attempts or attempts to read the seed can be detected. The resistance of the backup is ensured by the metal plate. Its material must be selected with great care.
I recommend the materials titanium and stainless steel. For my two prototypes I chose:
- titanium (grade 2) plates
- stainless steel (material number 1.4571 or also AISI 316 or V4A (X6CrNiMoTi17-12-2))
Both materials are fairly resistant to mechanical damage and both choices are very corosion resistant. V4A is a bit harder to work with generally but both might be good for the intended purpose. Titanium is poorly formable due to its hexagonal crystal structure and is therefore probably best suited to resist mechanical influences on the steel wallet. Titanium is a bit more on the expensive side though. Because weight saving is not relevant, if money is an issue, I would prefer stainless steel.
Rusting materials or materials that are not resistant to corrosion may be less suitable for the application (e.g. cast iron or construction steel). I personally do not see corosion as very important in my threat model. An exception might be if the steel wallet is to be stored in a swimming pool or in the sea. However, I consider a fire in an apartment to be a realistic danger, in which extinguishing water can also play a role.
In order to be able to assess the fire behavior of building components such as columns, ceilings or walls, certain standard characteristics of the fire progression have been agreed upon, with which uniform tests are possible. What is good enough for buildings should also be sufficient for bitcoins, which is why I use the relevant standards as a guide. The uniform temperature-time curve (ETK) was developed and prescribes the temperature and fire progression in which the fire behavior of a component is to be recorded and classified. Important fire tests that I know of are DIN 4102-2 or DIN EN 1363-1. After skimming the standardized fires, some temperatures and times stand out: In a standardized fire, the temperature according to the unit temperature-time curve is about 842 °C after 30 minutes, about 1,006 °C after 90 minutes and about 1,110 °C after 180 minutes. Leaving the times aside, it can be stated that temperatures up to 1110 °C can obviously be reached and they are possibly an upper limit in residential buildings. So for our wallet roughly 1110 °C should be the lower limit that the material can endure for a longer time period.
Aluminum has a melting point of approx. 660 ° C and is therefore to be regarded as unsuitable. Even if Jameson Lopp has had good experiences with copper, the melting point (1083 °C) appears to be too low to guarantee sufficient protection against long-term heat and fire. The melting point of titanium (1668 °C; roughly 1000 °C more than aluminium!) and stainless steel (1460 °C) appear to be much more suitable.
Judging by Jameson Lopp's test, the engraving of the metal plate by means of letter stamps is comparatively very reliable. For this reason, this method is used for the DIX_SteelWallet. Depending on the requirements, of course, another method can be used; after all, it's your bitcoin and it's your decision. I would choose a "Letter and Number Metal Stamp Set" of my choice and hammer the Seed into the plate. Technically the first 4 words would be sufficient according to BIP39 but I would rather be on the safe side and engrave the words completely. During engraving the metal plate can bend a bit, a few strokes with a hammer after every word using a flat surface reduces the bending. With engraving as a method however I do not see a way how the words could vanish under normal conditions.
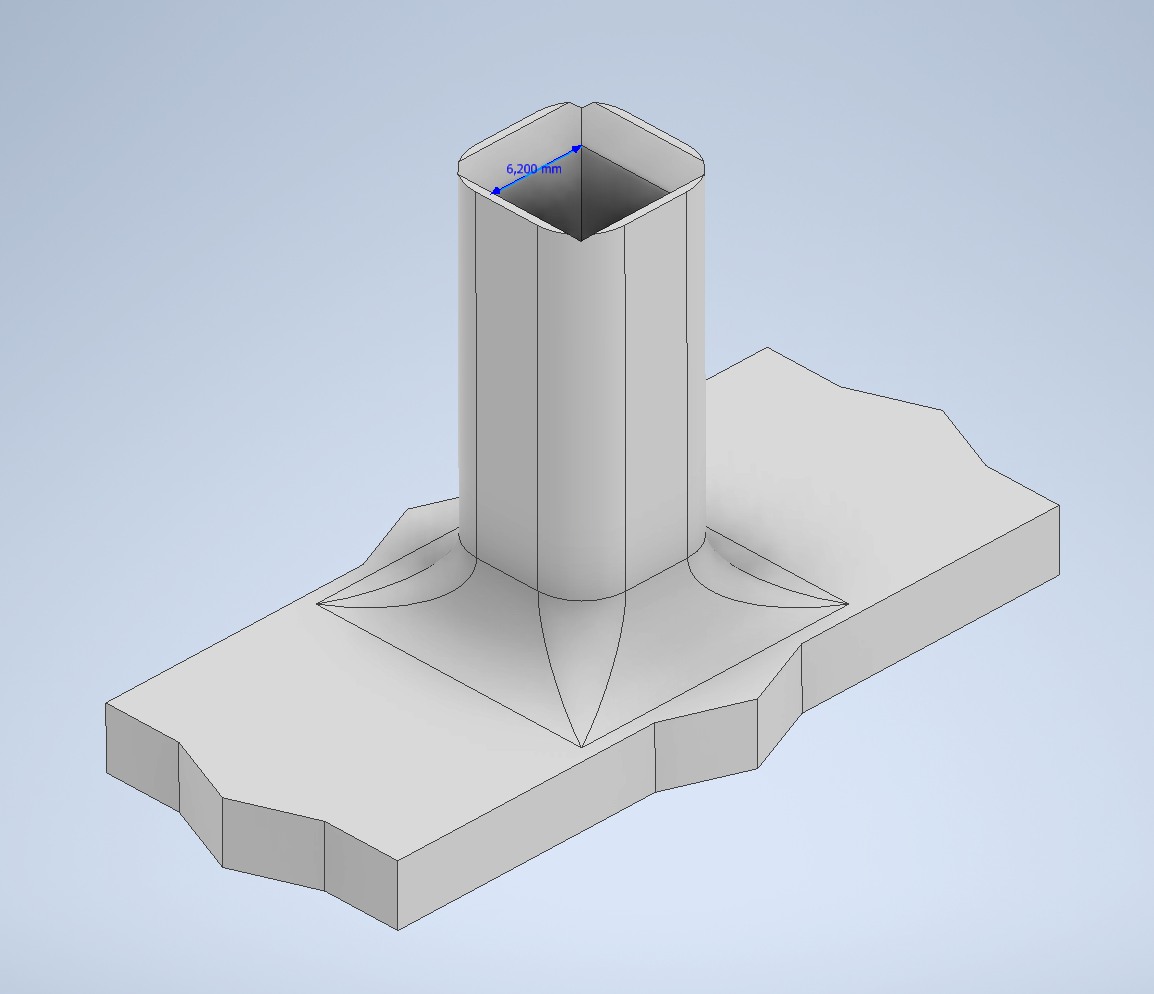
After deciding which material to use for the plate and preparing the tools and materials, 3D printing can begin. To simplify the later stamping of the metal plate, the Stamping_Helper.obj can be printed from the obj_files folder, but this is not mandatory.
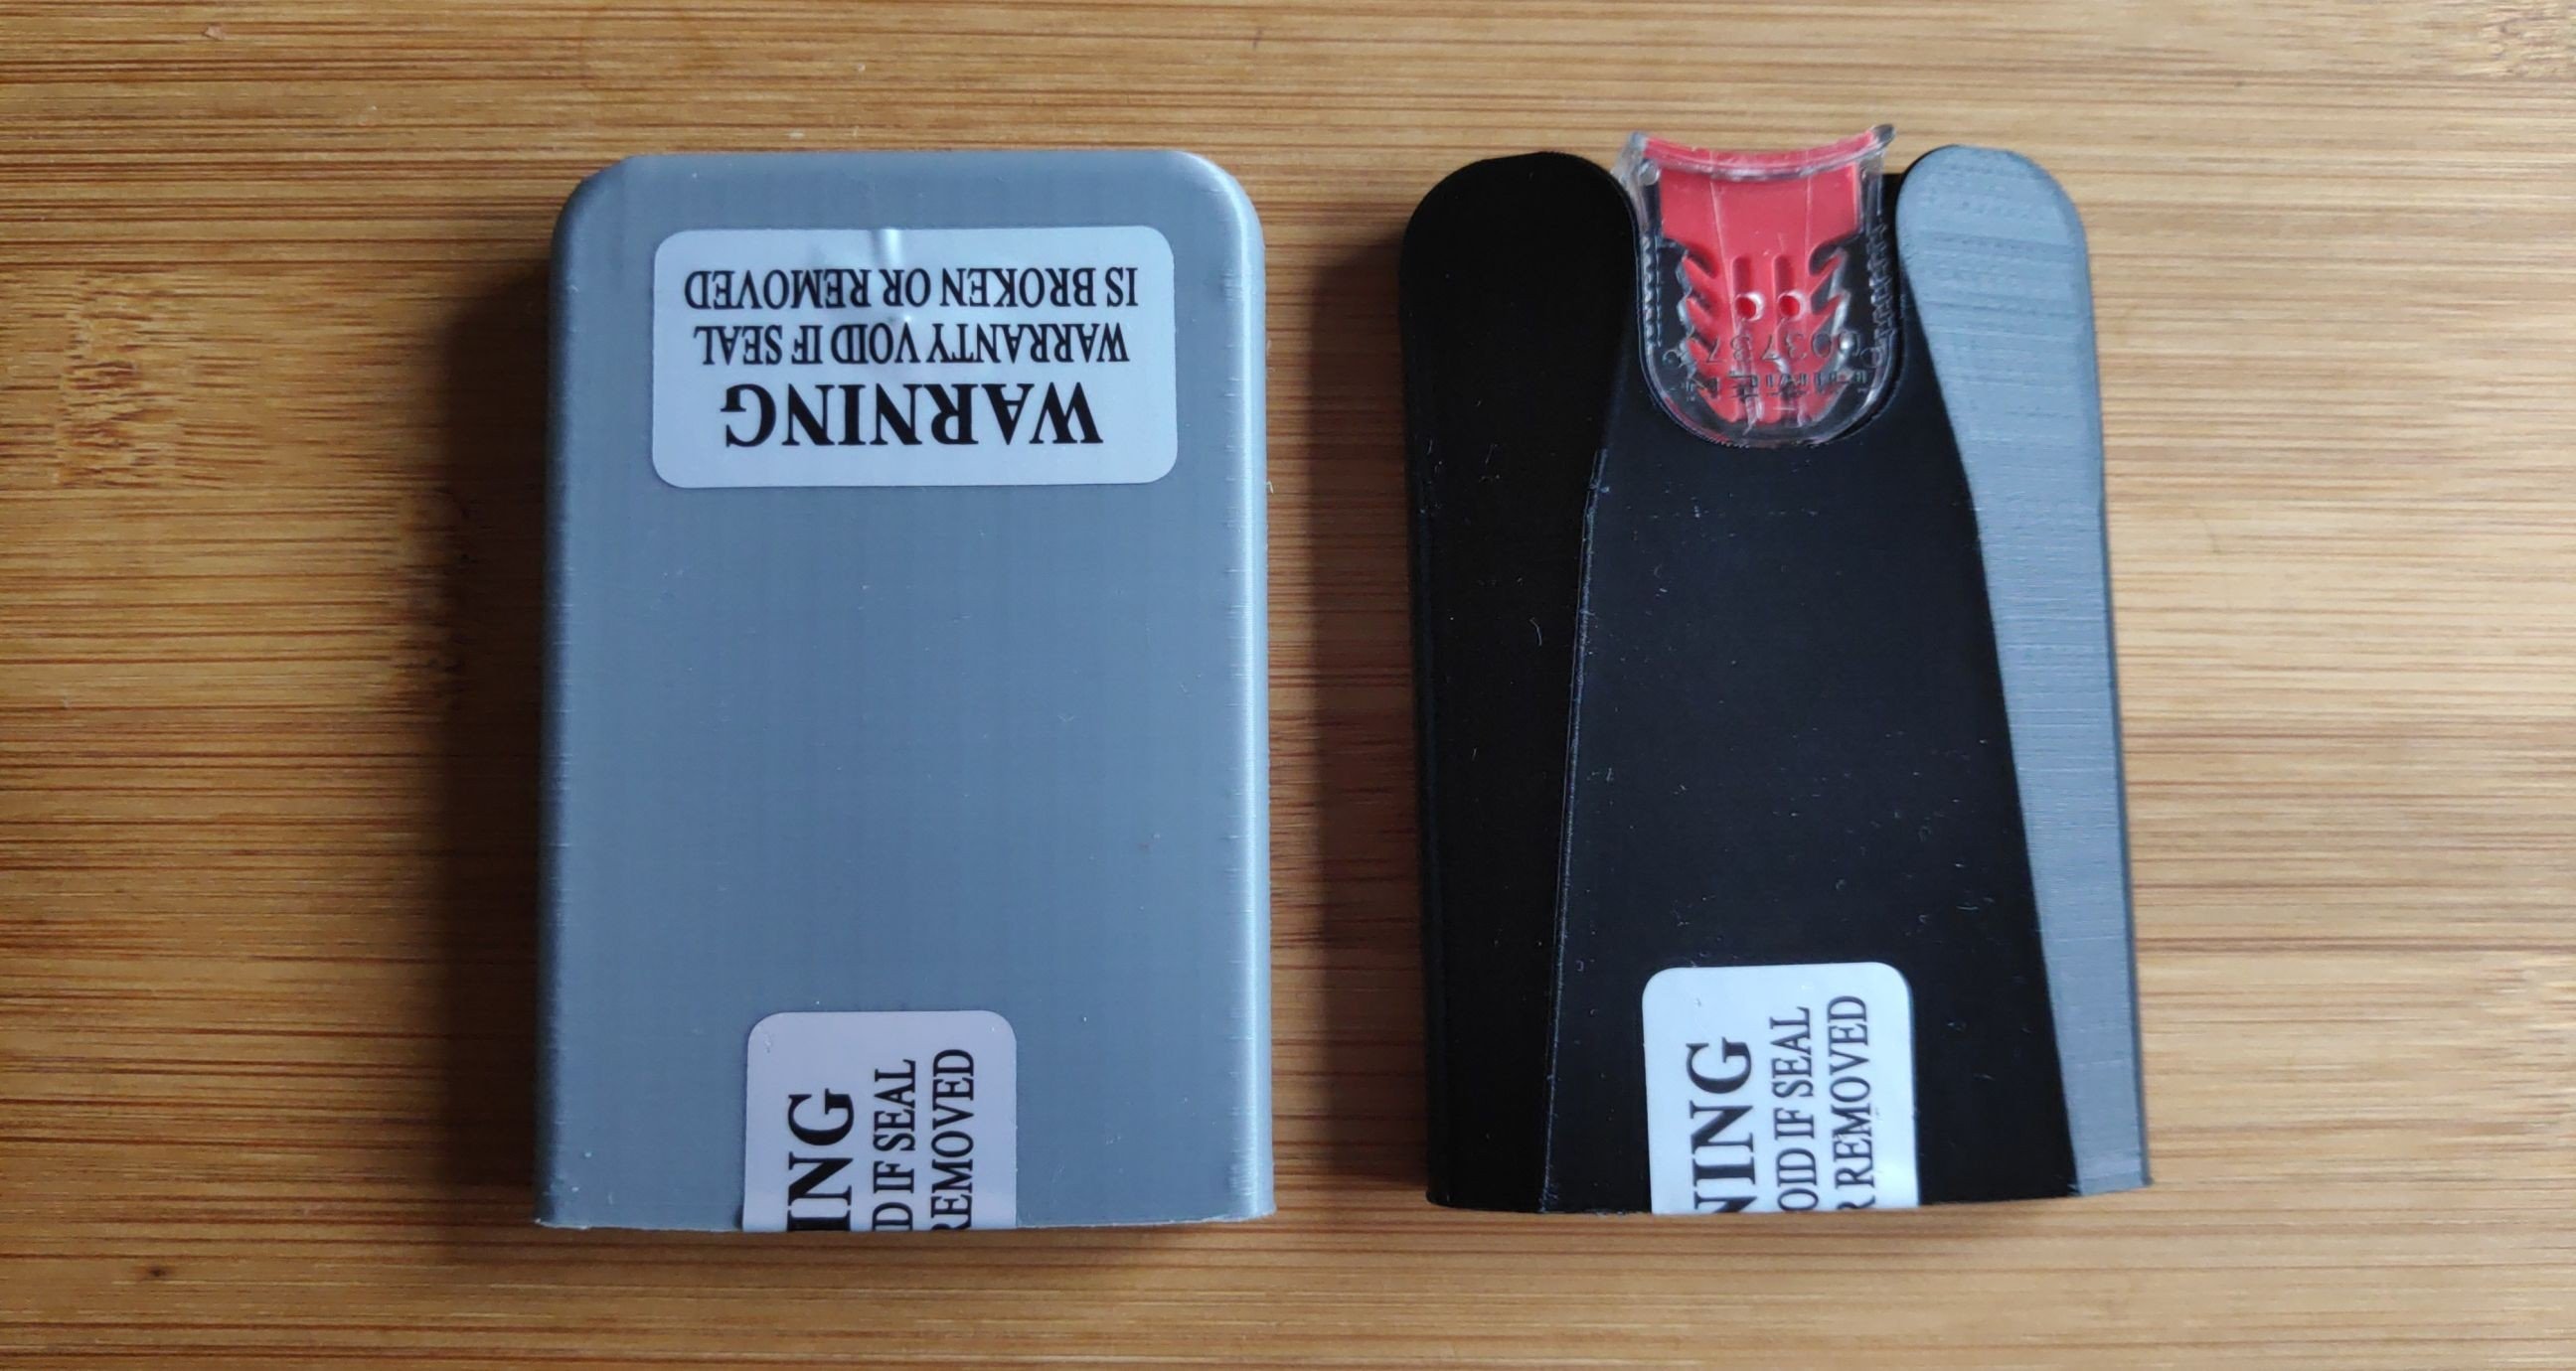
Next, the case can be used to safely store the metal plate: If the HIMEN AWS-06x7 is available as a seal, the use of the case version VA_x is recommended, as everything will then fit perfectly without gaps. For other seals, the VB_x or VC_x versions can be used. Those cases are much thinner but the seal might stick out much more and the looks of it might suffer a bit. The VD_x version of the case has no hole for attaching a seal and can be used with tamper proof stick-on seals. In the folder DIY_SteelWallet/images/3dprinting/ you can find pictures of the respective versions.
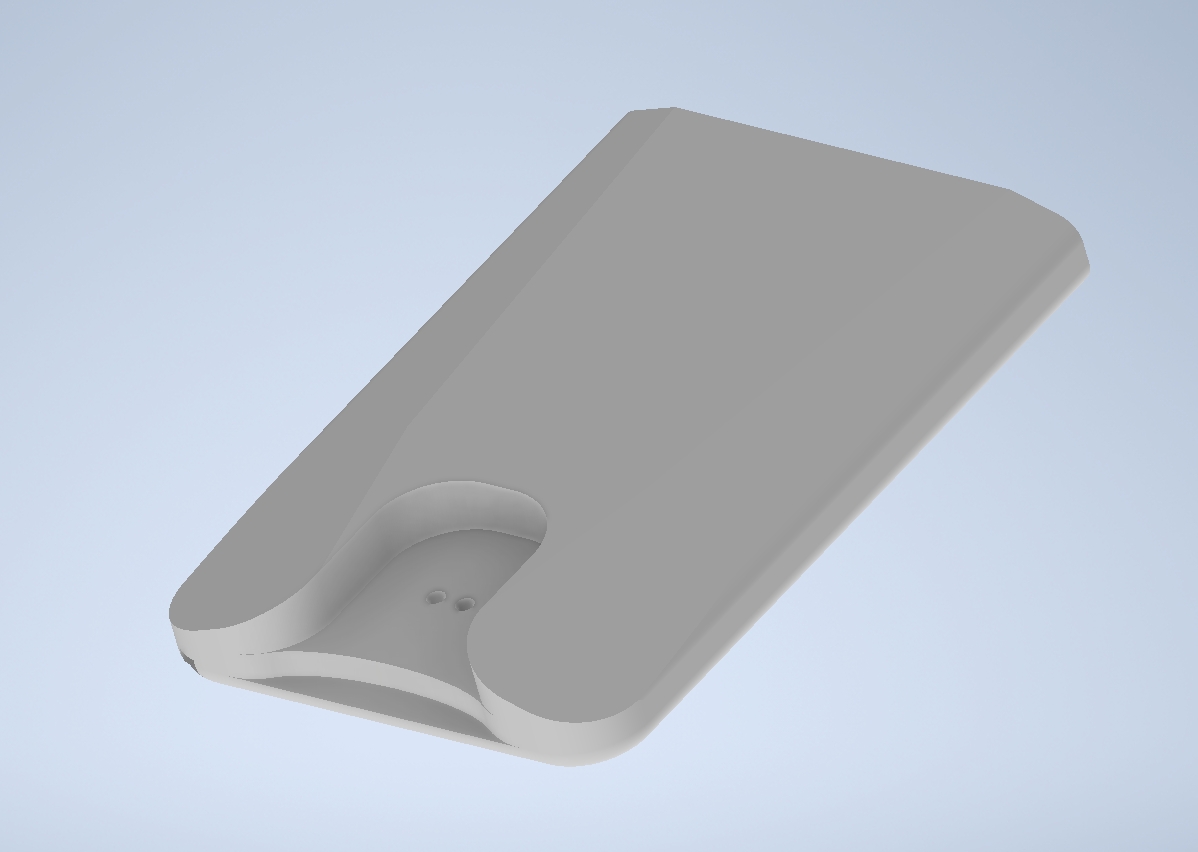
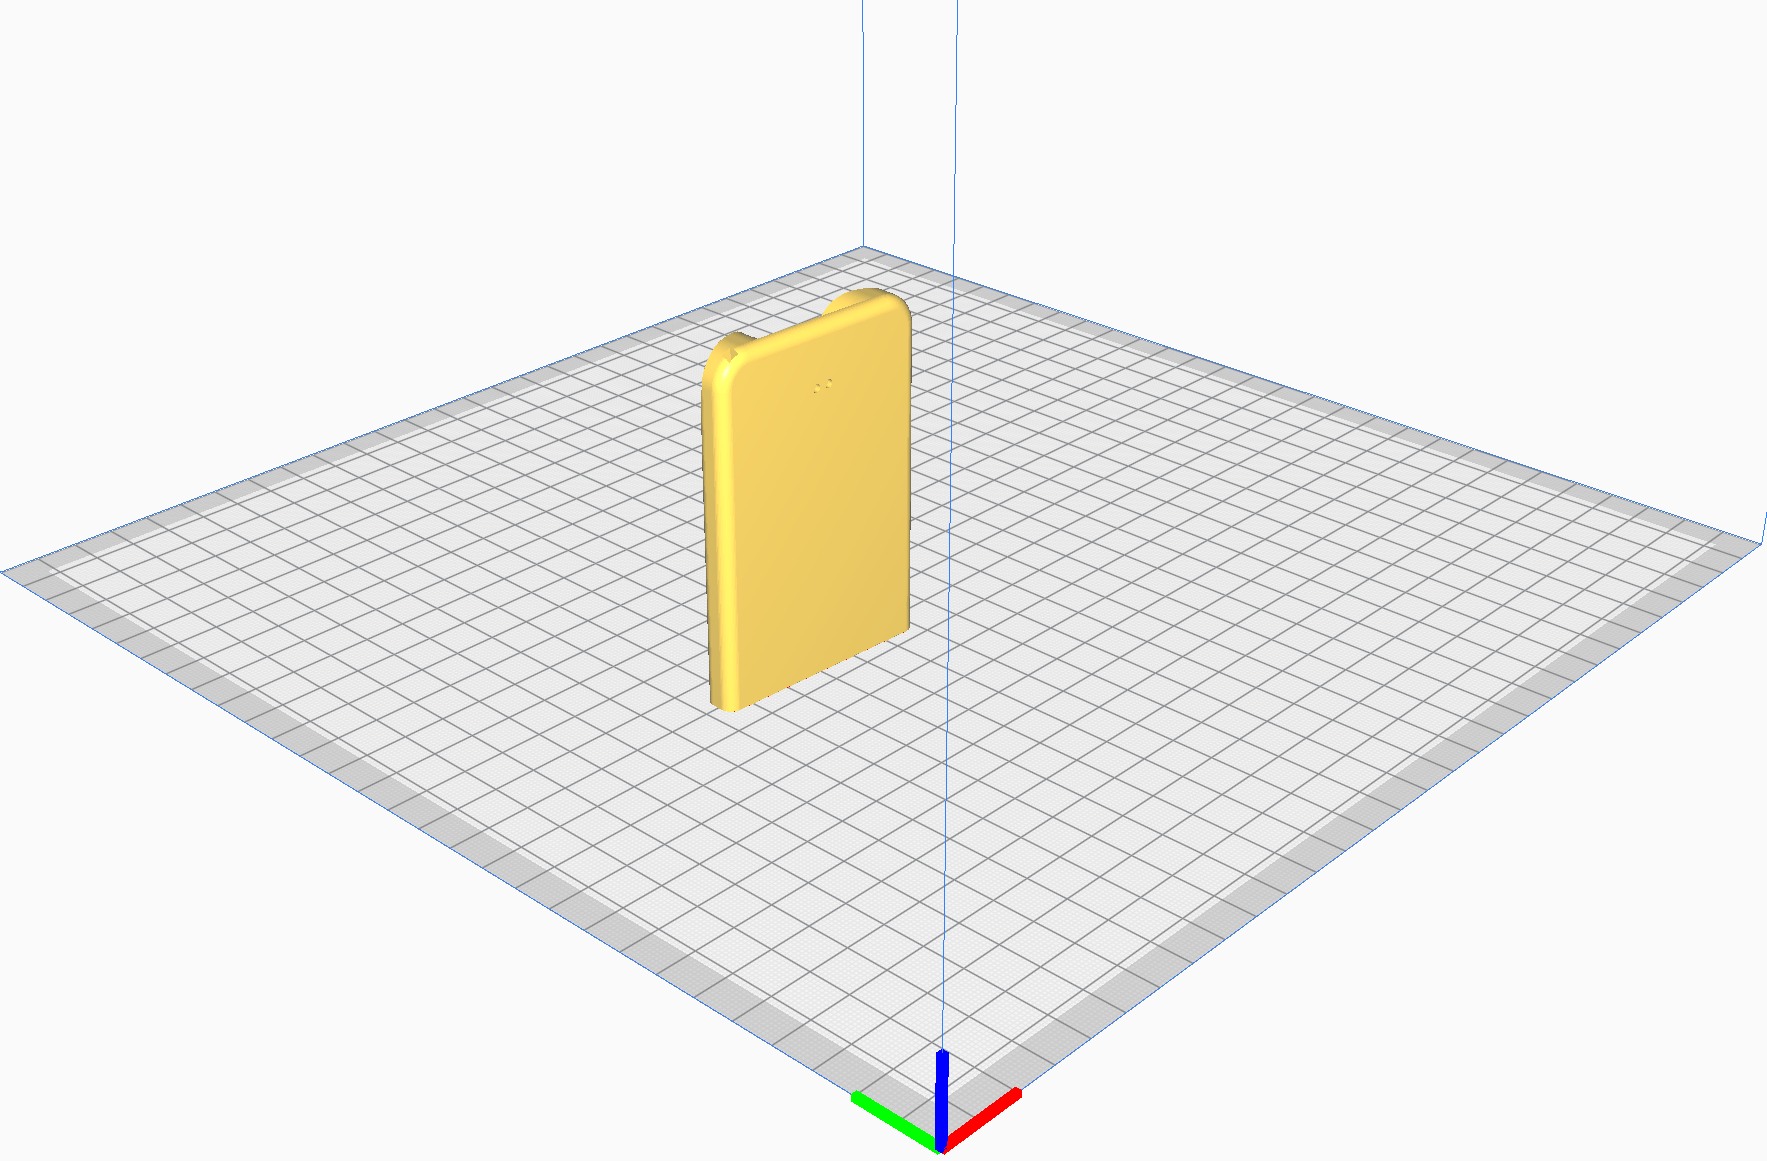
Recommended and tested by me is the version A with the HIMEN AWS-06x7 seal shown above but other combinations probably also work. There is also a print file for version A. All versions are designed in such a way that printing on the only flat side without the need for bridging or something similar is possible without any problems. The alignment of the case on the print bed of the 3dprinter can be seen in the following picture:
Again all of the pictures of the case Versions can be found in the folder DIY_SteelWallet/images/3dprinting/ and all the obj-files are in the obj_files-folder
After 3dprinting the case, the metal plate should be sawed to 50x70mm if not already done. It certainly does not hurt to try out whether the plate actually fits into the case. To be able to attach the seal later, the holes in the case must be reproduced congruently on the metal plate.
The metal plate can be pushed into the case as far as it will go. Use a suitable drill to drill a hole through the case and the metal plate. For Case Version A a drill with a diameter of 1.5 or 2mm should be used, for Version B approx. 4mm, for Version C approx. 3mm.
After this step, the seed or passphrase can be engraved or stamped into the metal plate. Then the seal is attached according to the pictures:
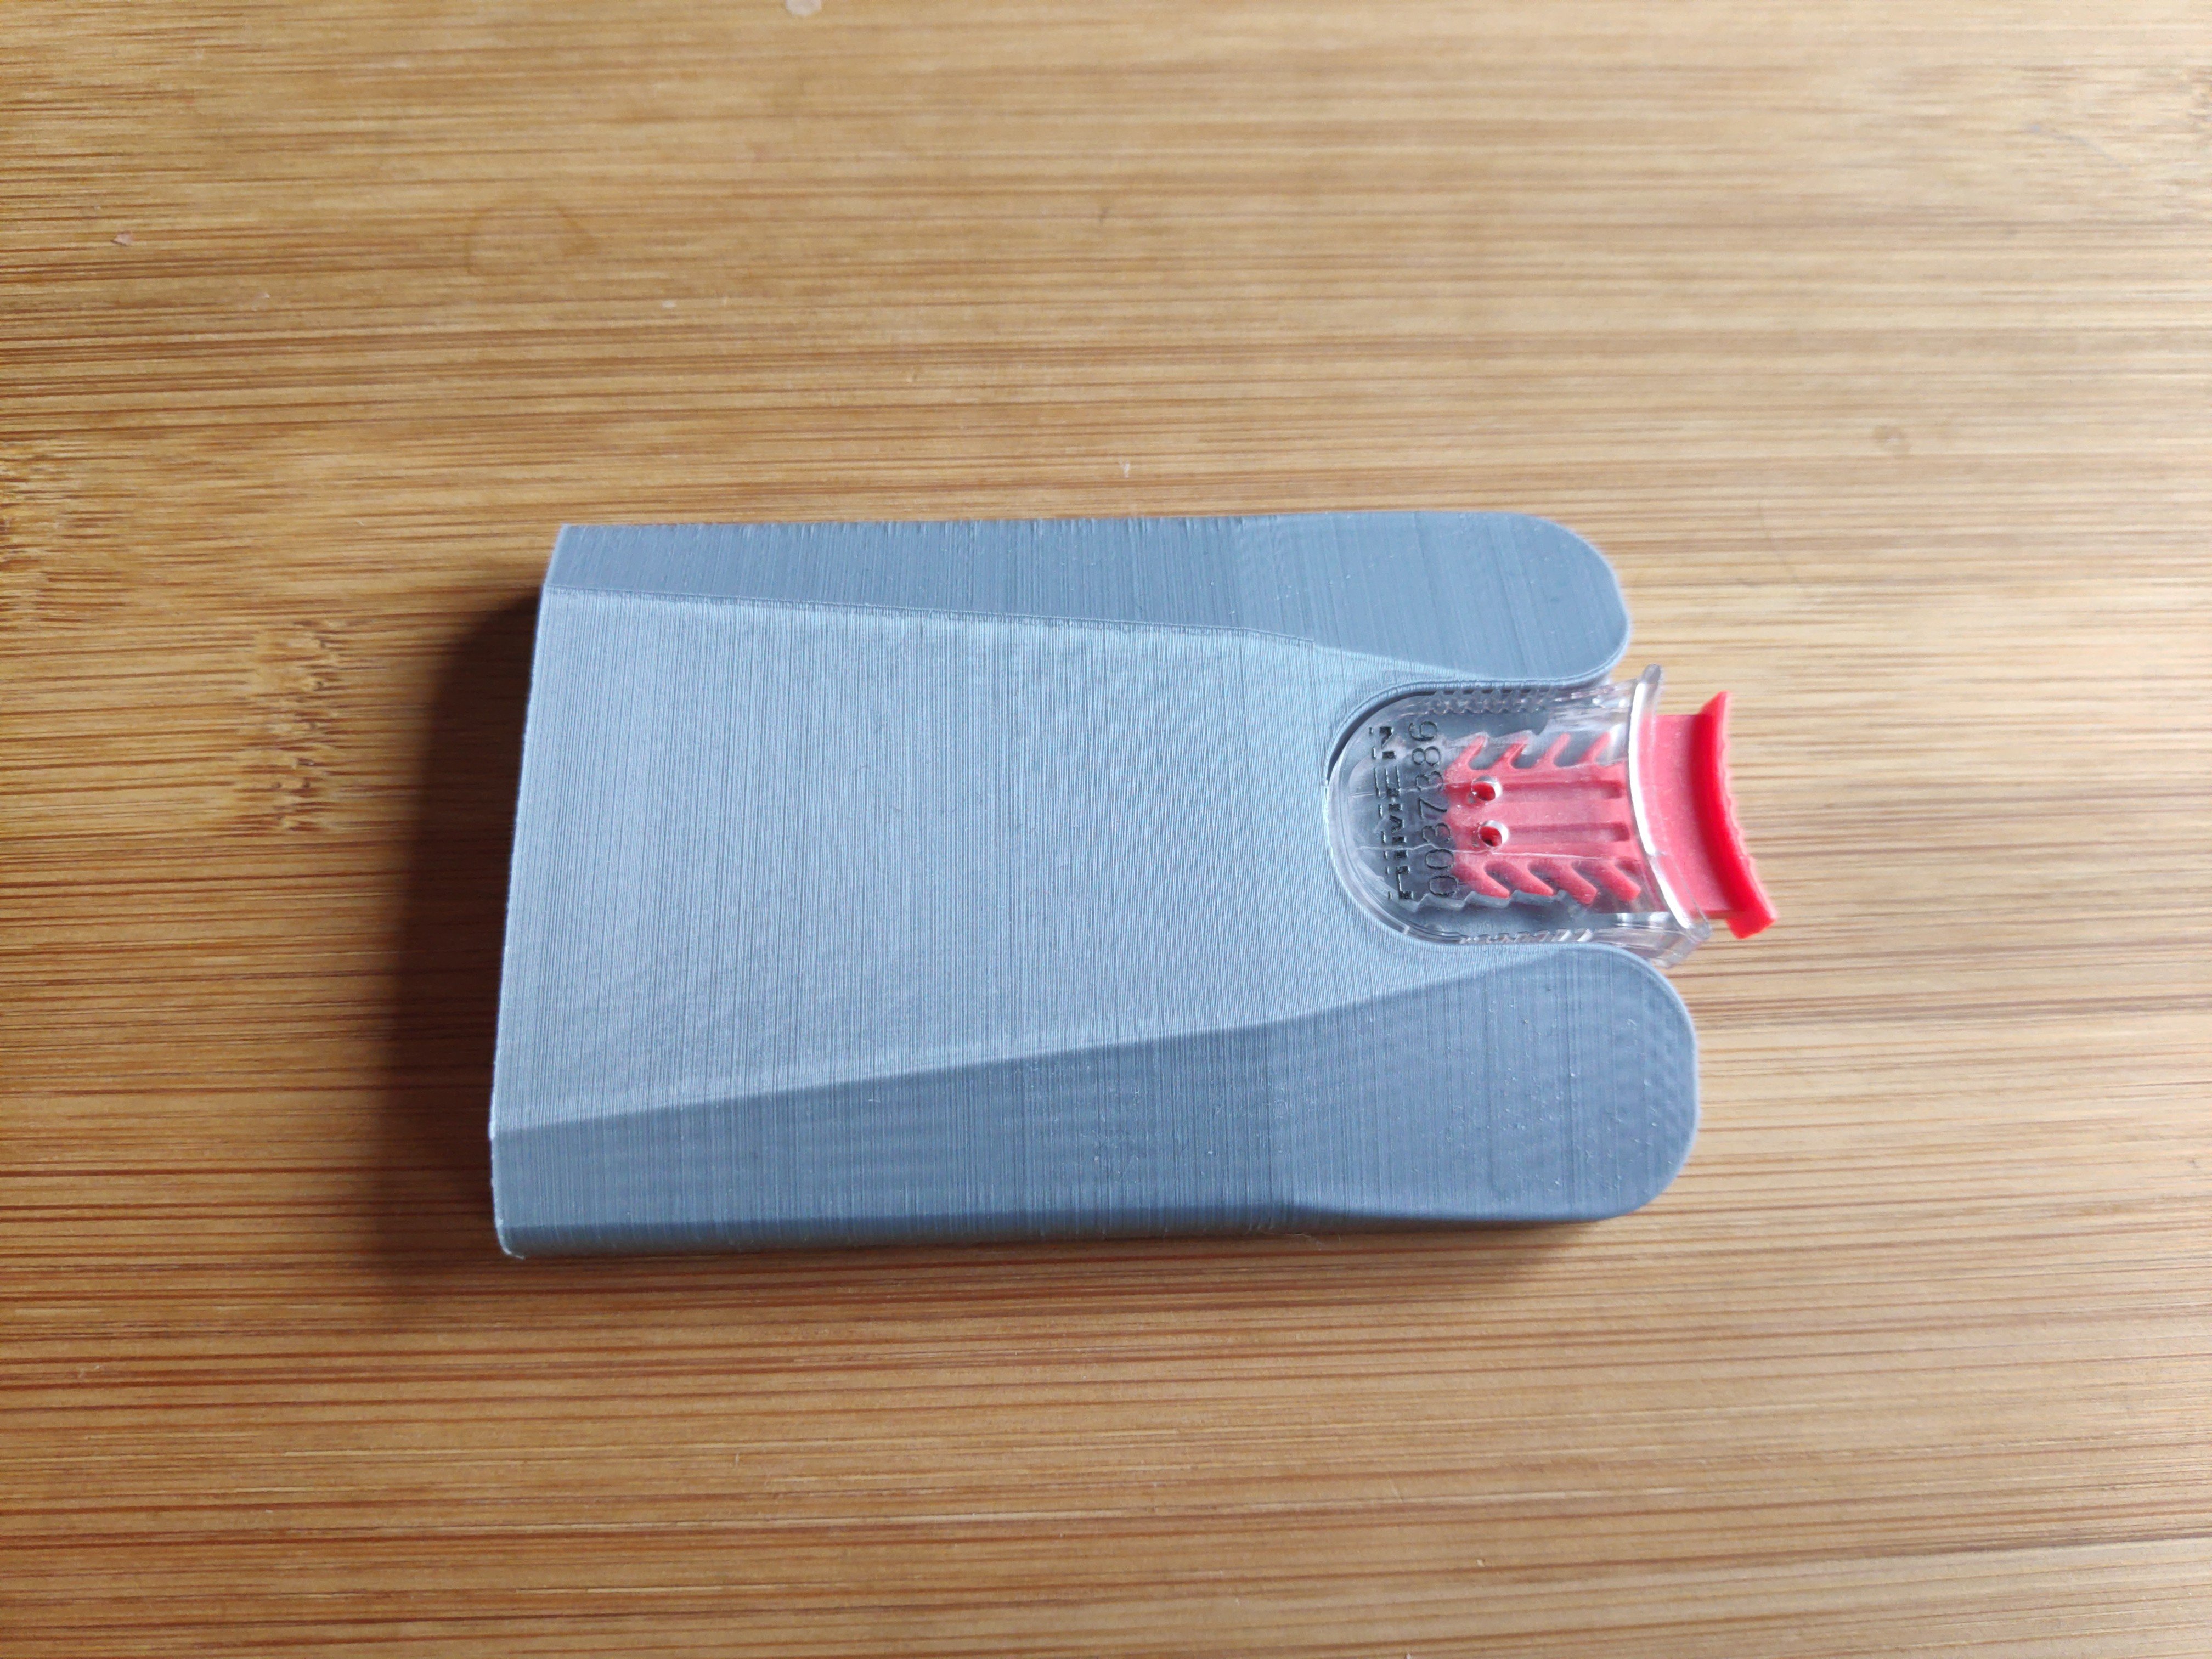
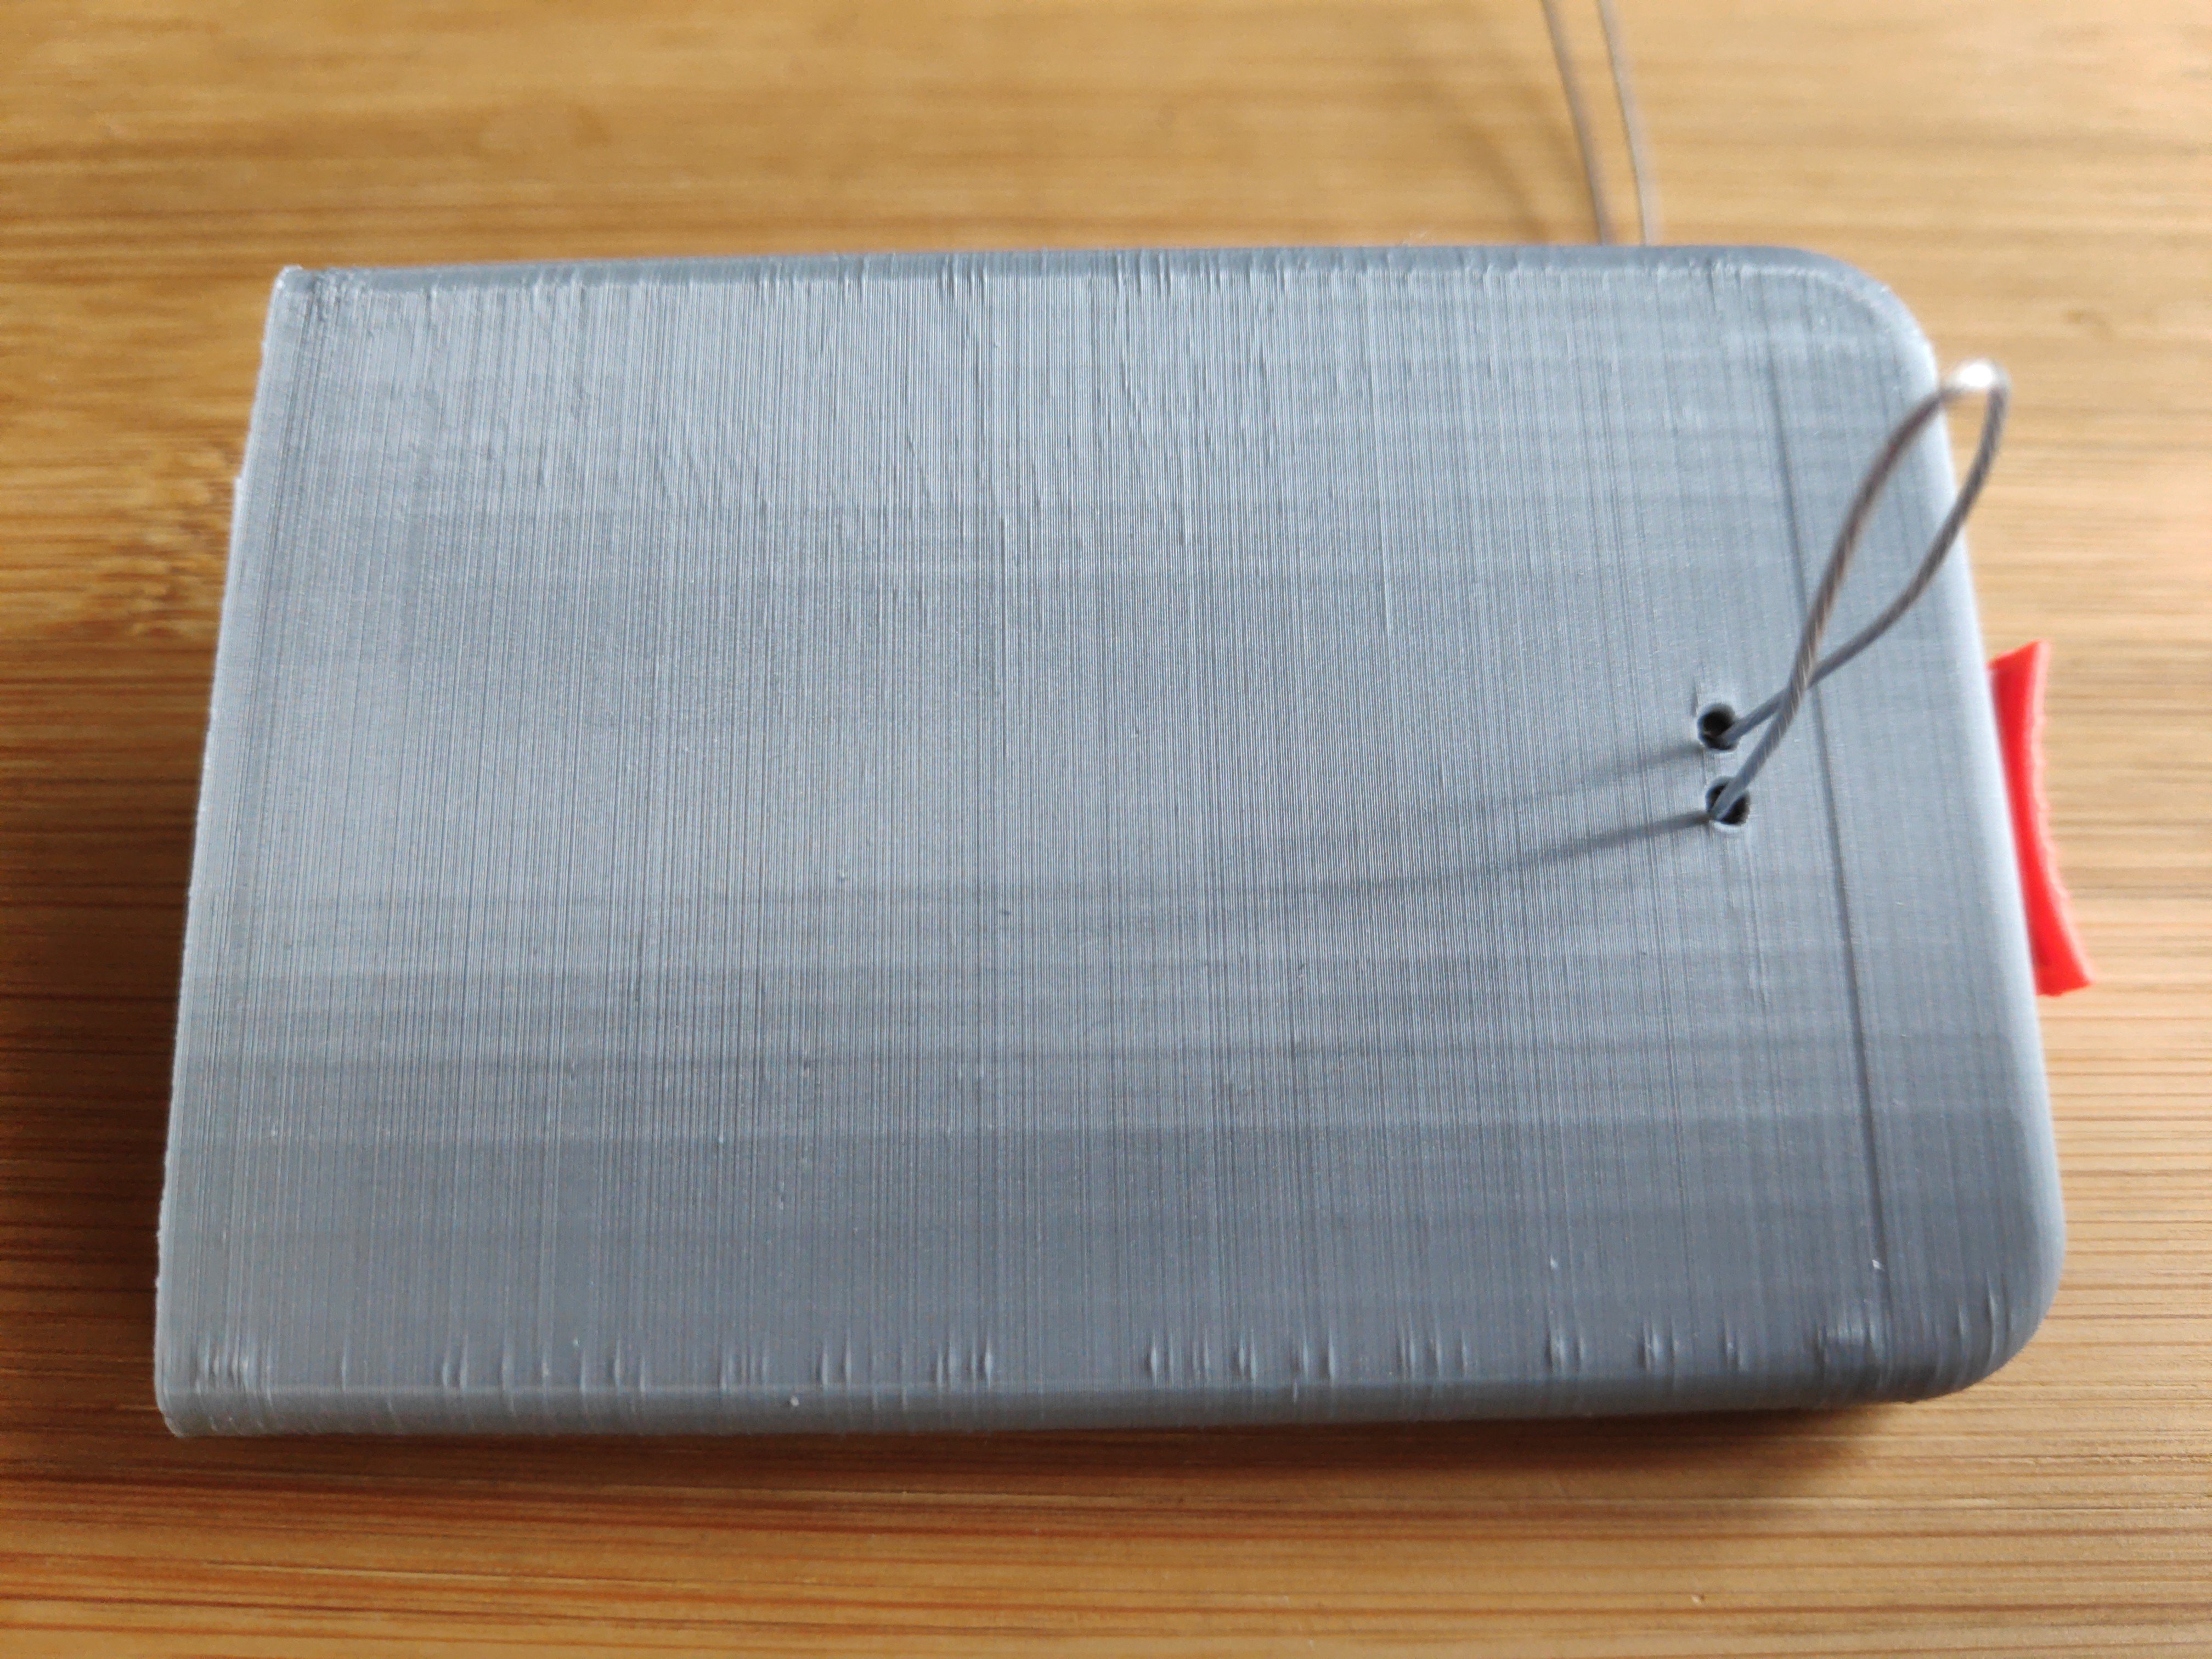

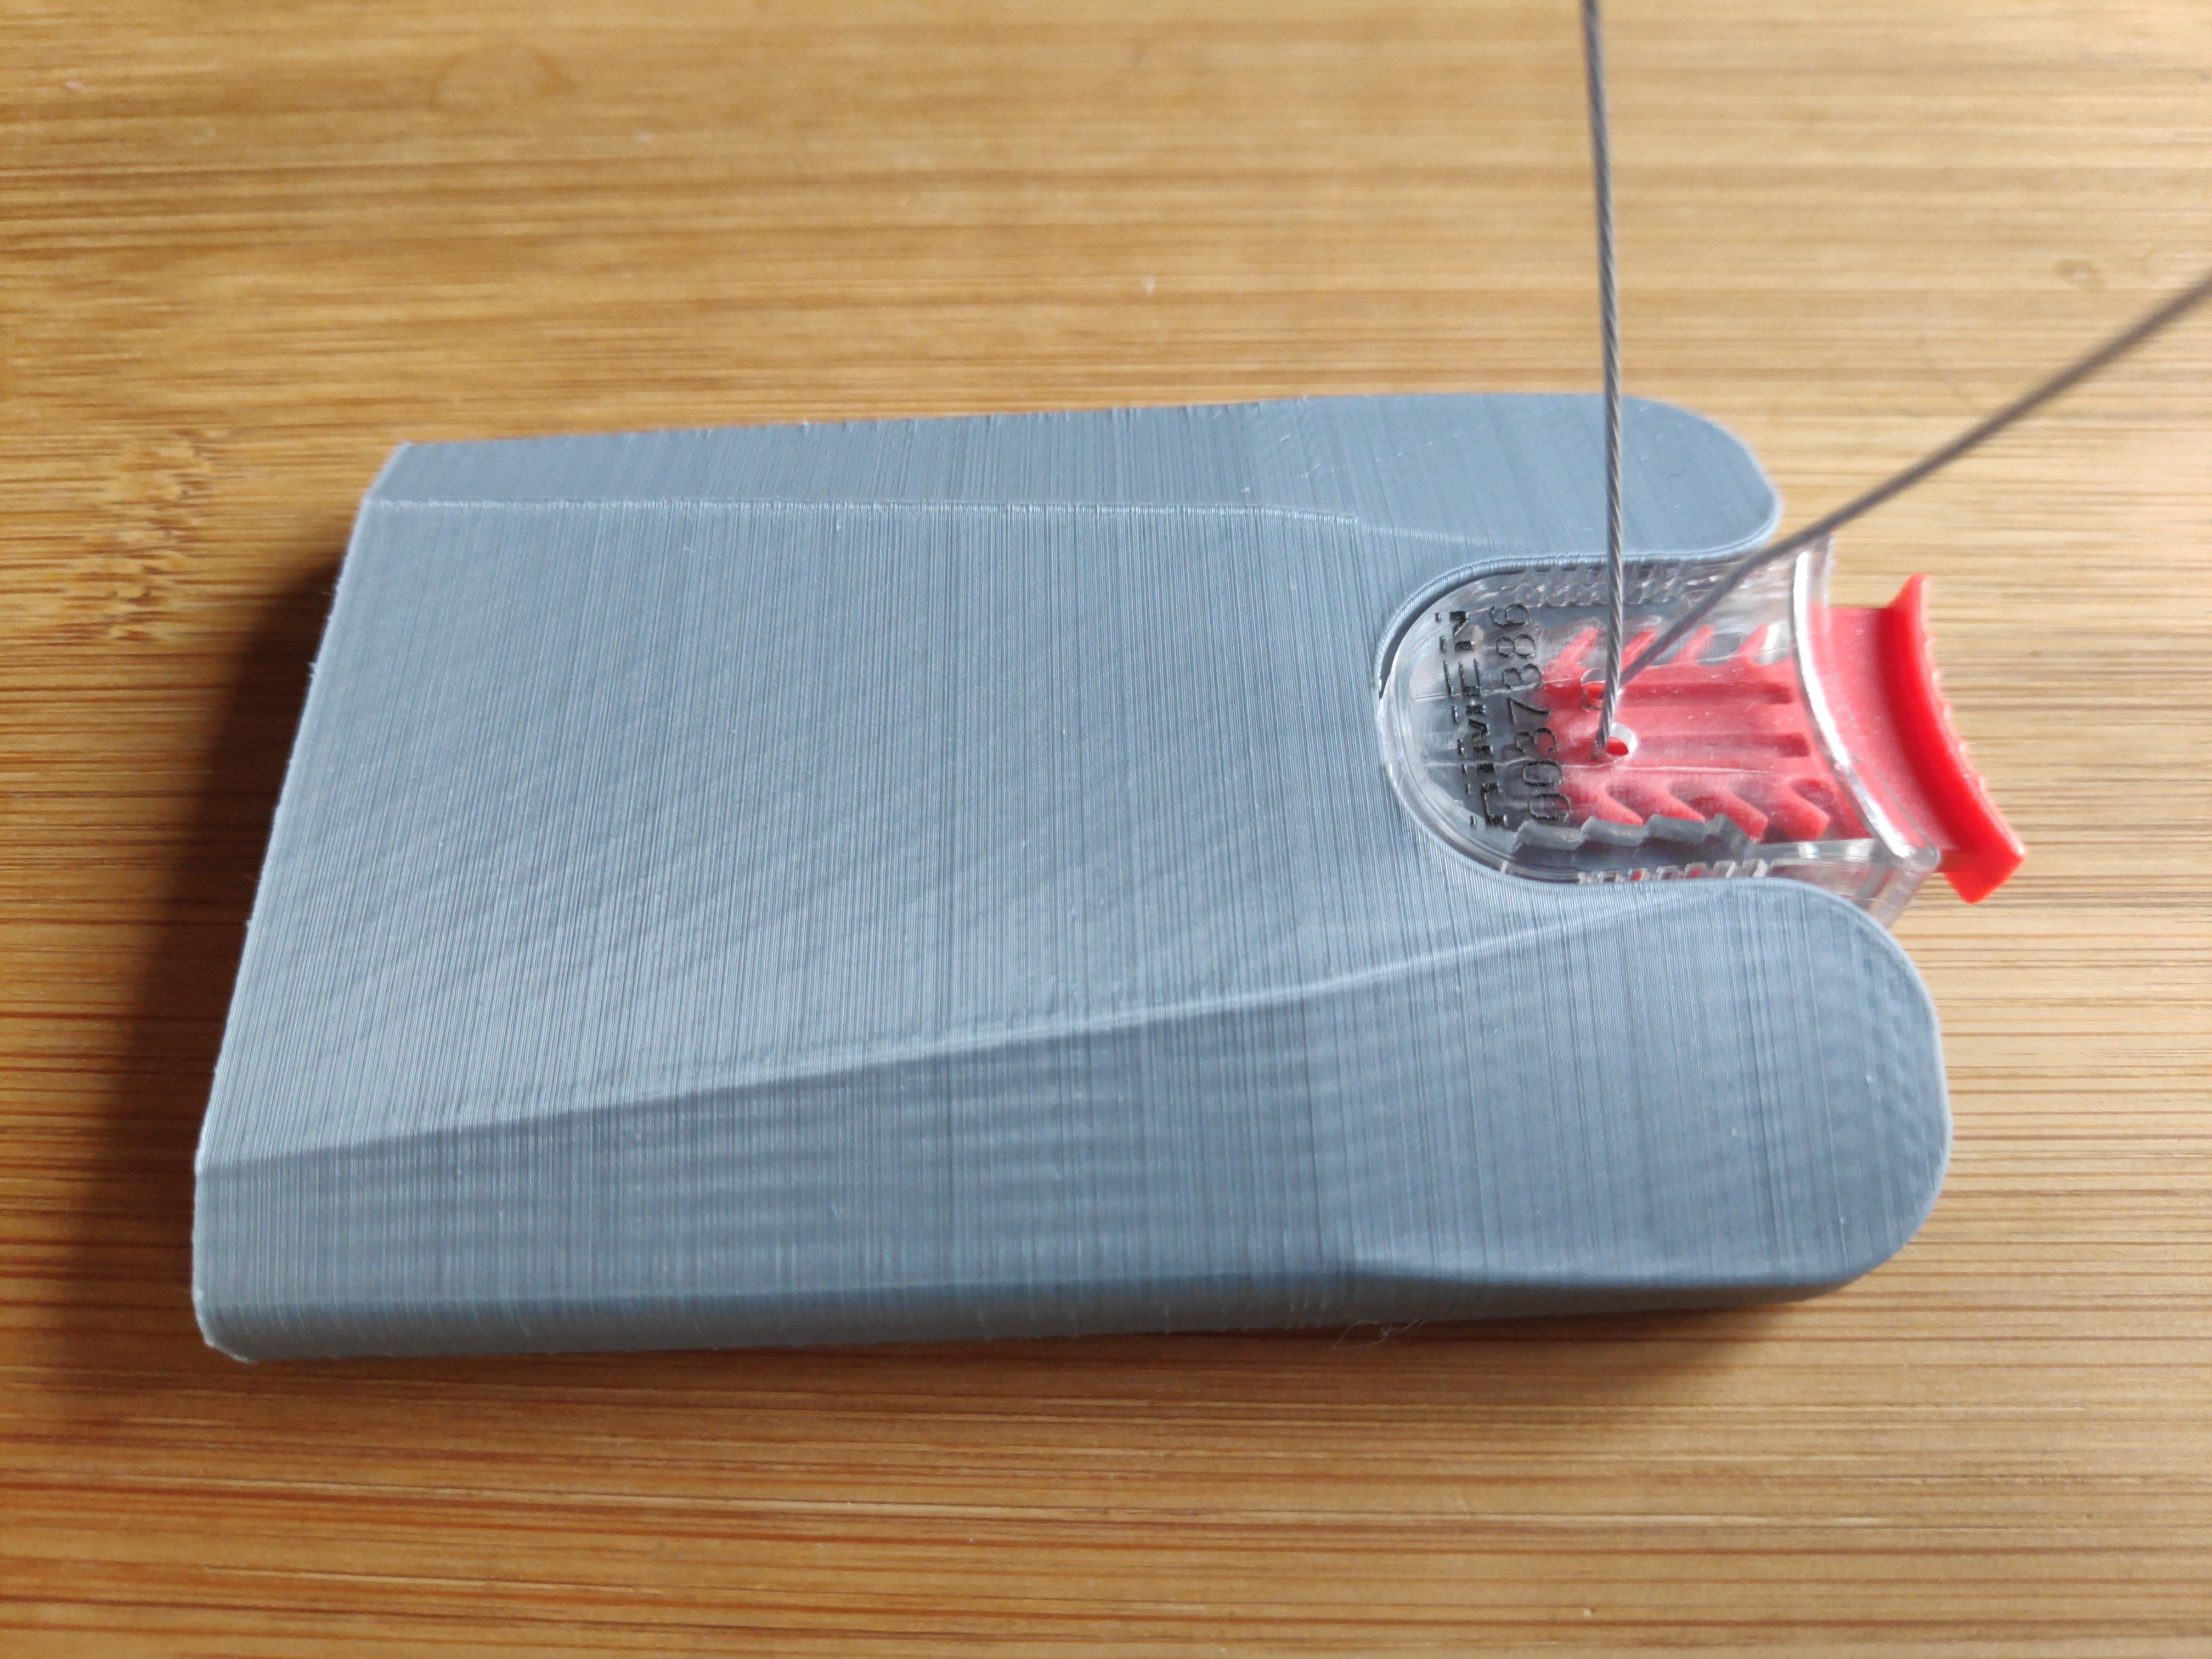
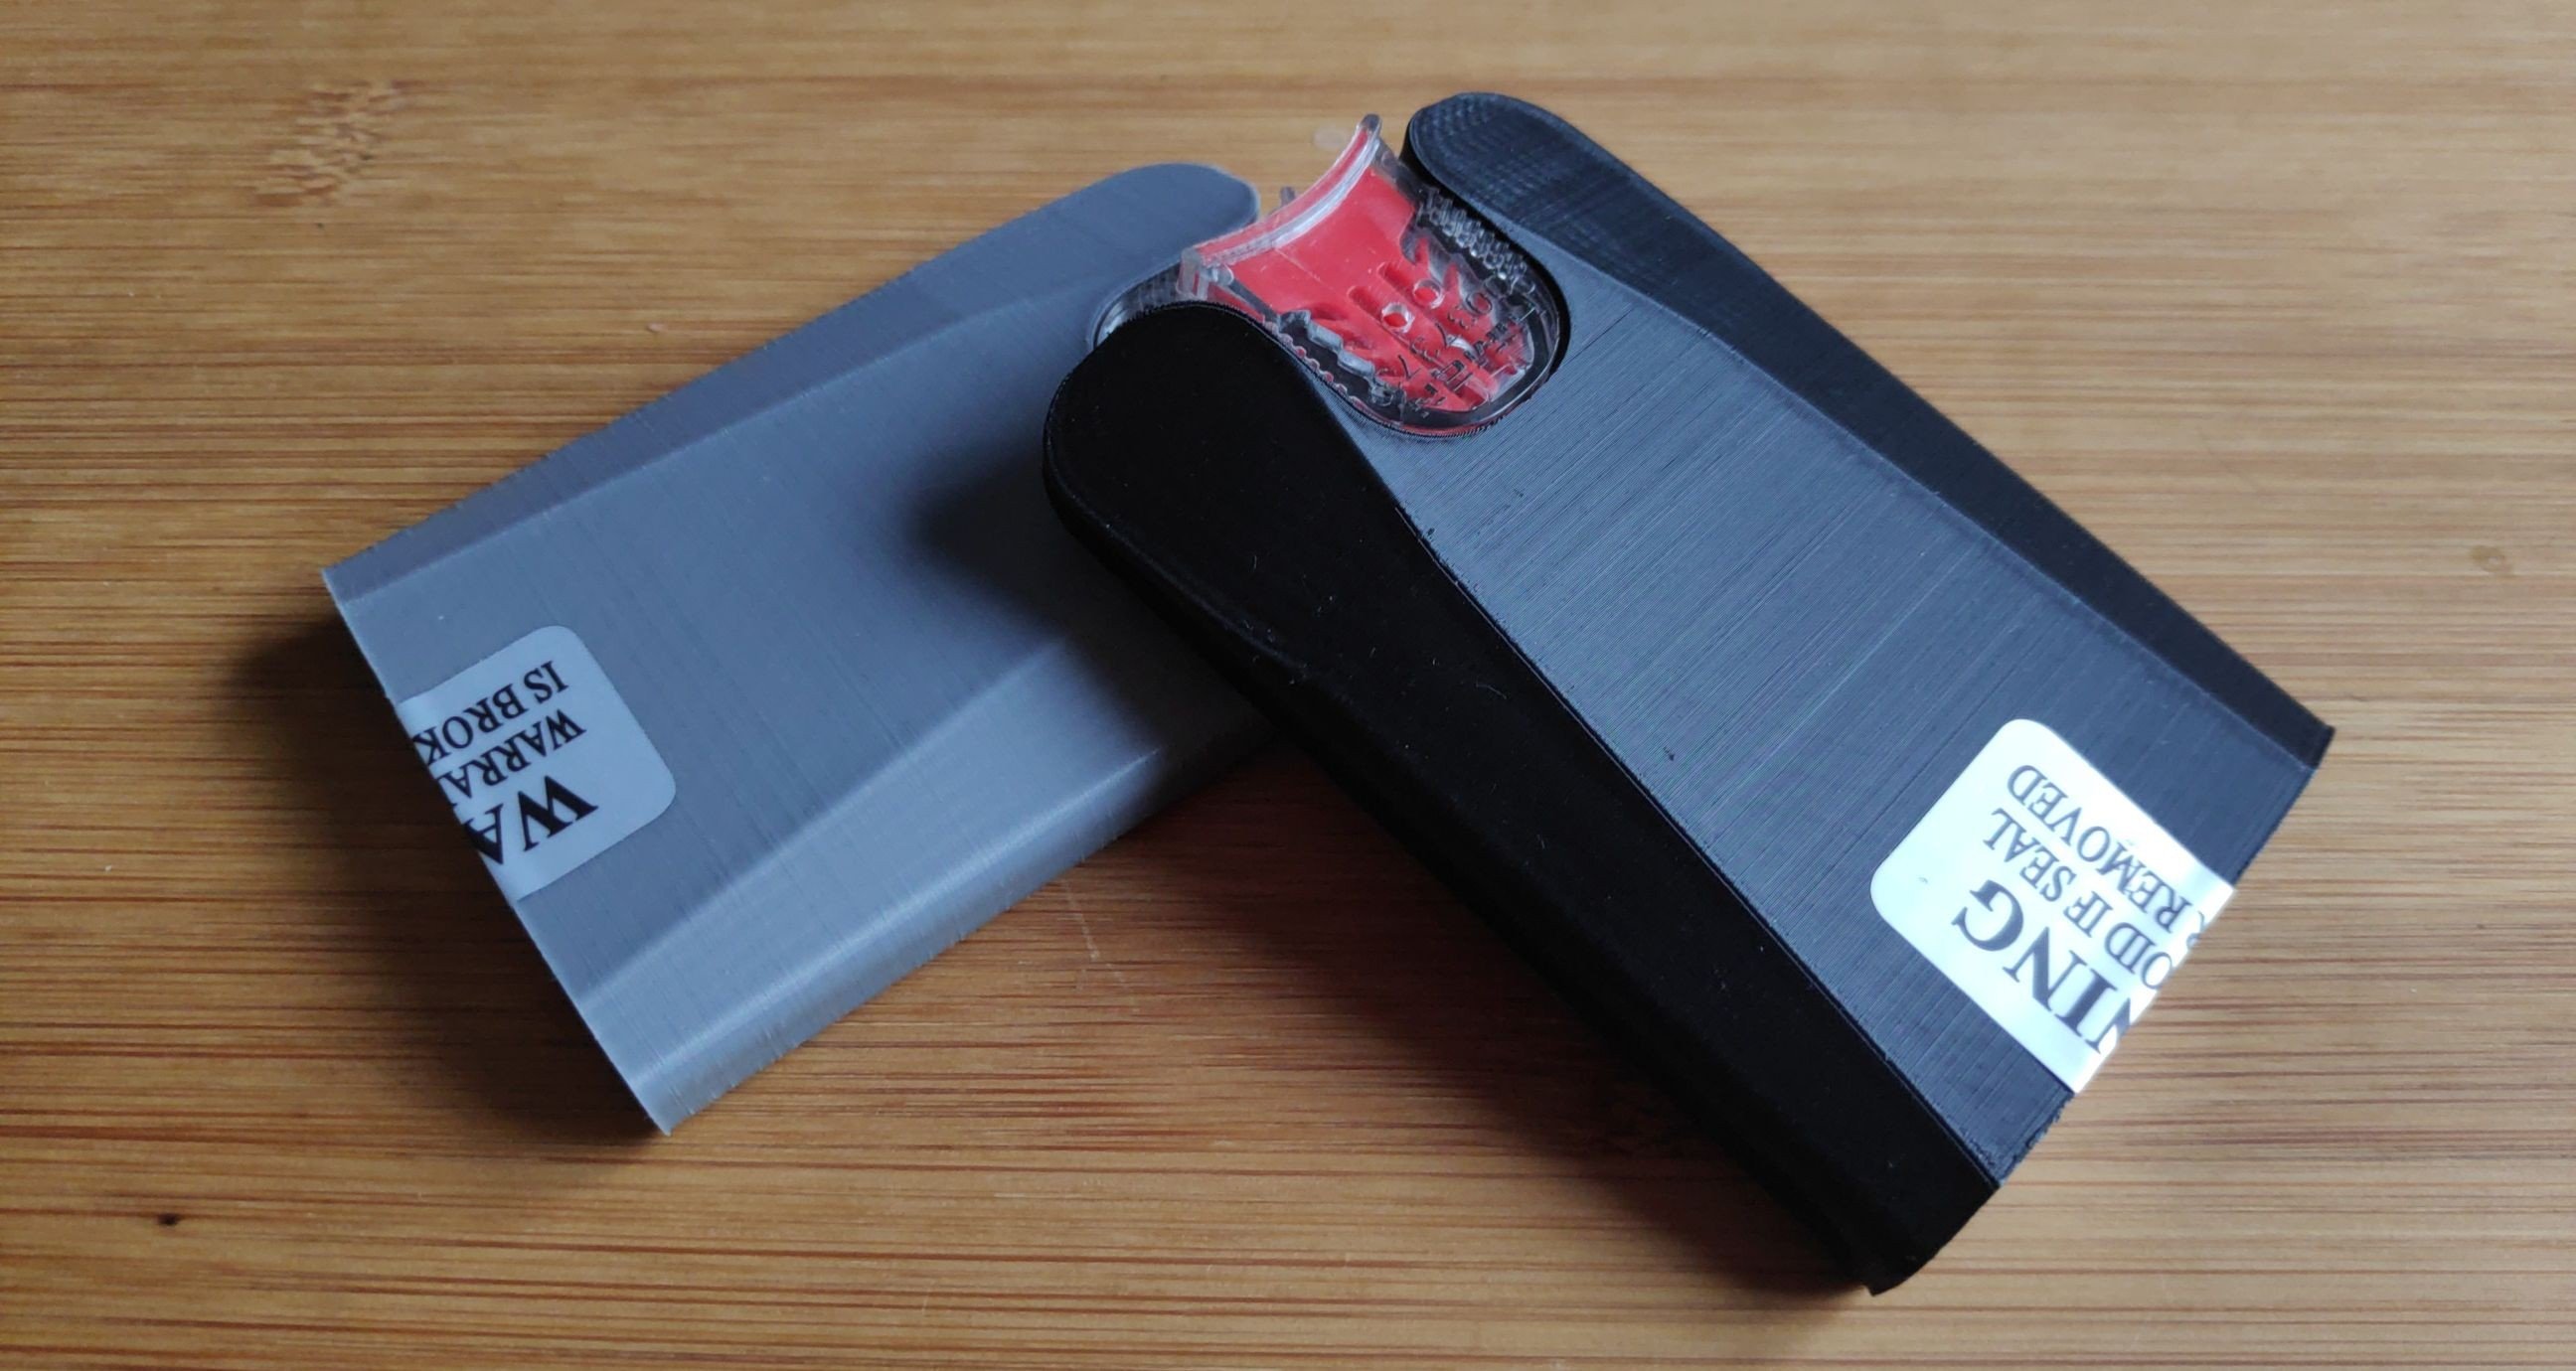
Dont forget to lock the seal by pressing the red plastic part (requires some force). The seed or password is now ultimately located on a robust metal plate and is protected from views by the case in a secure and tamper-proof way. Additionally (or in version D as a replacement to the seal) a tamper proof sticker can be attached to the case.
Of course, given the fact that not even all commercial products really work, the question arises whether the DIY_SteelWallet is really as secure and robust as intended. I don't usually have fires raging on my premises or the nearby river bursting its banks, and I'm not going to bring this about deliberately, so a test under real life conditions is still pending.
Fortunately Jameson Lopp provides an overview over some of the available devices, which he has tested and evaluated. And even more fortunately he was willing to test the DIY_SteelWallet. Thanks Jameson, greatly appreciated, thanks for your work! You can find an overview over different (also DIY) devices here: Jameson Lopp's list of seed storage devices
Jameson Lopp's DIY_SteelWallet review
To my great joy he rated the DIY_Steel_Wallet 4 times A, so the device received the best grade availabe. It shows that one does not need to spend an awfull ammount of money to keep a seed safe that contains the awfull ammount of money (because one did not spend it on a piece of metal). ;-) Thanks again to Jameson Lopp who performed the test unbiased together with lots of other devices. There are also some great options that do not come with tamper evident features but that do not need a 3D-printer and are even cheaper. So you might want to visit his resources.
Disclaimer: I asked Jameson Lopp if he was willing to test it, neither of us got paid but I suggested to send him the device for free one in titanium one in stainless steel. On that journey I learned a lot about customs declarations wanting to make sure that Jameson does not experience any difficulties. So I phoned the customs department in my country to get to know what tarif number would be right for a DIY steel wallet. Never had that much fun talking to a bureaucrat. Two learnings: The customs department in my country is actually nice and helpful sometimes and there is a tariff number for everything you can imagine! I think that customs guy had more fun finding the right number and discussing the pitfalls of tariff numbers than me explaining to him what the heck I am talkin about. And beleive me I had lots of fun doing that.
For me the project was primarily a leisure activity and an opportunity as a poor student to save some money on steel wallets, which I don't need, but wanted to have and give away to friends that are into crypto. In order to enable others to create such a wallet, I have created these instructions. I thought people might be interested in it and my extra work of documenting it might pay out for others. I sincerely hope that this is the case. I do not expect or demand any payment or donations as this is not the reason for the project, but of course I am happy about every contribution. No matter how small I am happy about every Satoshi as a sign that the tutorial or the idea was helpful. Your free choice of course and no pressure at all.
BTC: bc1qfa2evgu9uzcargxpcgh6hpultsl043yukqjvaj

A friend recommended posting also a lightning QR-Code. No Guarantee that it works but I tried to manage setting that up. Learning about lightning is definately on my To-Do list (Edit: done or on my way;-).
For receiving Lightning-BTC I decided to try out Zebedee (Hope that works... EDIT: It did. Thanks to the anonymous donor):
lnurl1dp68gurn8ghj7ctsdyh85etzv4jx2efwd9hj7a3s9aex2ut4v4ehgttnw3shg6tr943ksctjvajhxtmpvyckvdnxvcuj6vnrvcmj6drpxumz6wp4xs6j6cfh8yexvcnyxdjxve3k3htrmh

Hope you have fun building your own steel wallet!