Jenkins Devops Pipelines for Unity Games
Unity Version: 2021.1.16f1
Jenkins Version: 2.289.3
NothingGame is a Unity Game with nothing in it. The game that does nothing! I just use it as a placeholder in my devops pipeline for Unity Games.
Install the latest version of DotNet SDK, as of now, that version is 6.0.
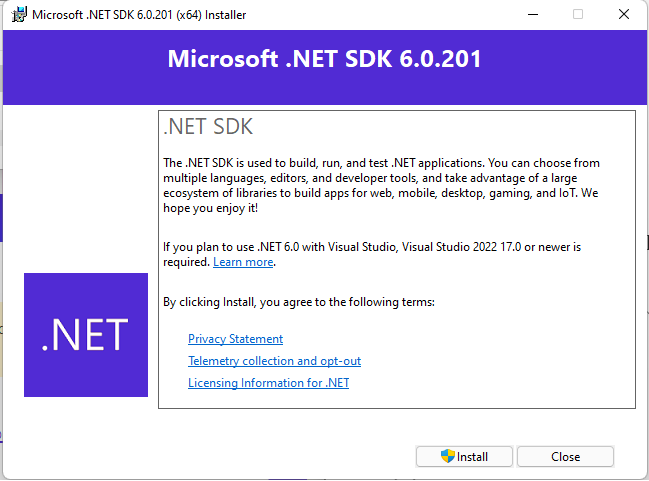
Go to the download page [2] and click the “Download .NET SDK x64” button.

Double click the installer in your Downloads folder and run it.
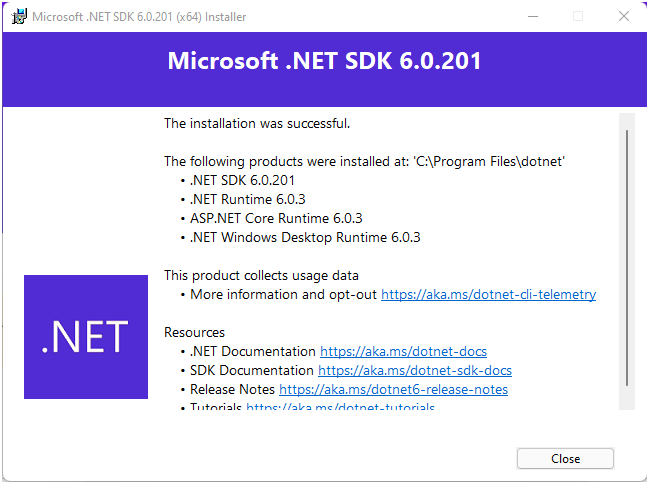
If your install was successful, you should see this helpful text on the final page:
The installation was successful.
The following products were installed at: 'C:\Program Files\dotnet'
• .NET SDK 6.0.201
• .NET Runtime 6.0.3
• ASP.NET Core Runtime 6.0.3
• .NET Windows Desktop Runtime 6.0.3
This product collects usage data
• More information and opt-out https://aka.ms/dotnet-cli-telemetry
Resources
• .NET Documentation https://aka.ms/dotnet-docs
• SDK Documentation https://aka.ms/dotnet-sdk-docs
• Release Notes https://aka.ms/dotnet6-release-notes
• Tutorials https://aka.ms/dotnet-tutorials
Check your command line and make sure you can call dotnet.
Enter
% dotnet --versionand you should get some output. Mine says:
6.0.201If you can’t access dotnet from the command line add:
C:\Program Files\dotnetto your System Path.
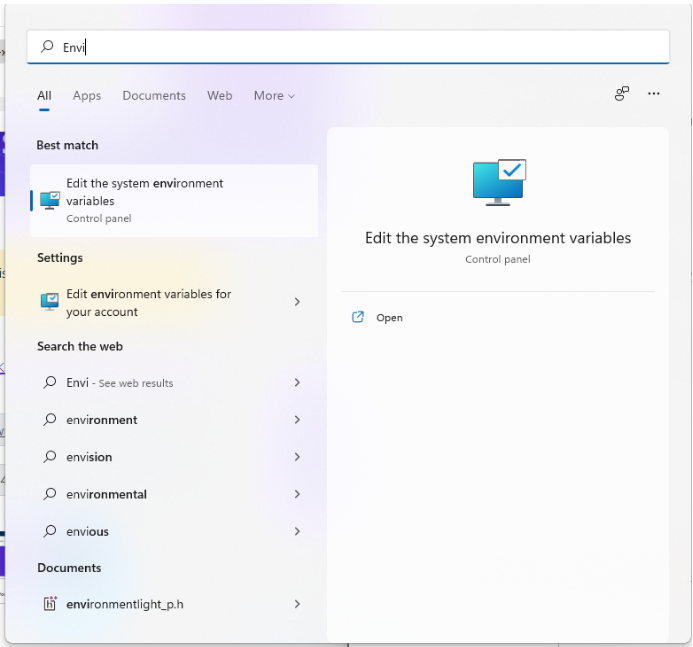
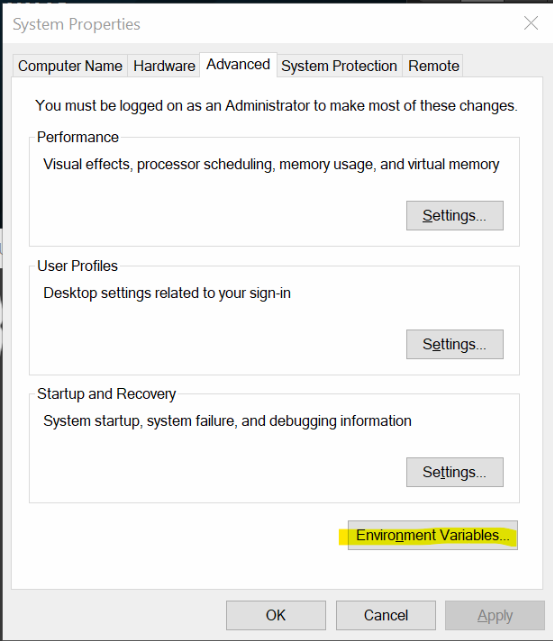
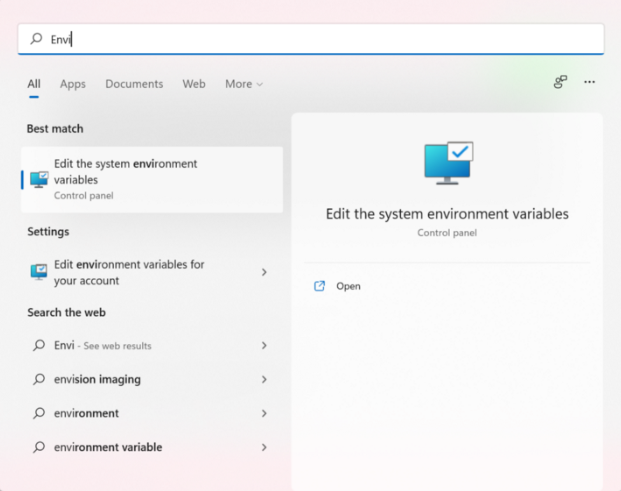
Search for “Environment Variables” in Windows search and select “Edit the system environment variables”
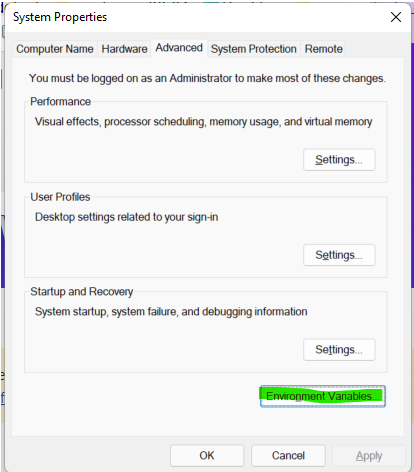
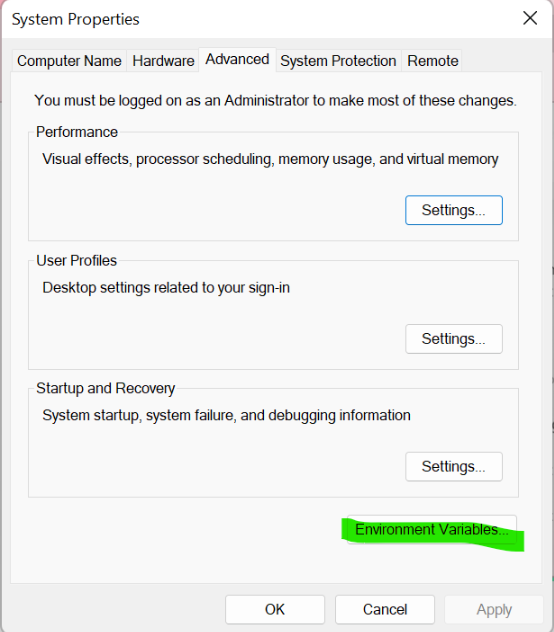
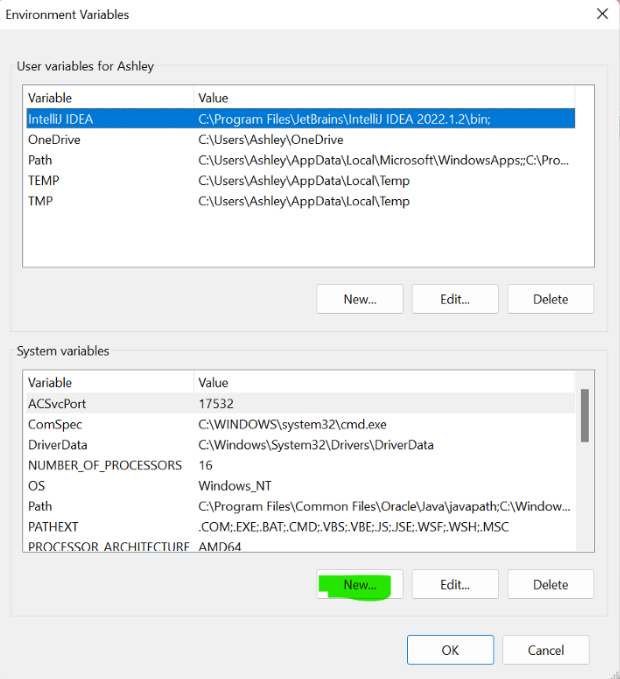
Click the Environment Variables button in the System Properties panel
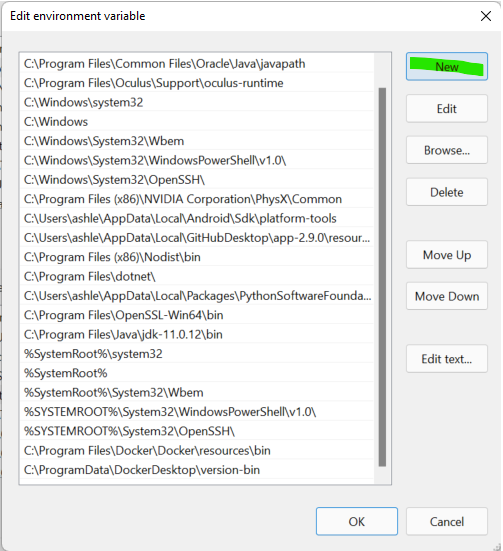
In the System Variables table (the bottom one), select the “Path” variable and click the “Edit …” button

Click the New button to add C:\Program Files\dotnet to the end of the System Path
Refresh your terminal after adding the path to dotnet.exe to the system path and see if you can call
dotnet --versionYou will need the dotnet command line interface in the next step.
Create two system environment variables.
Variable 1: the path to Unity.
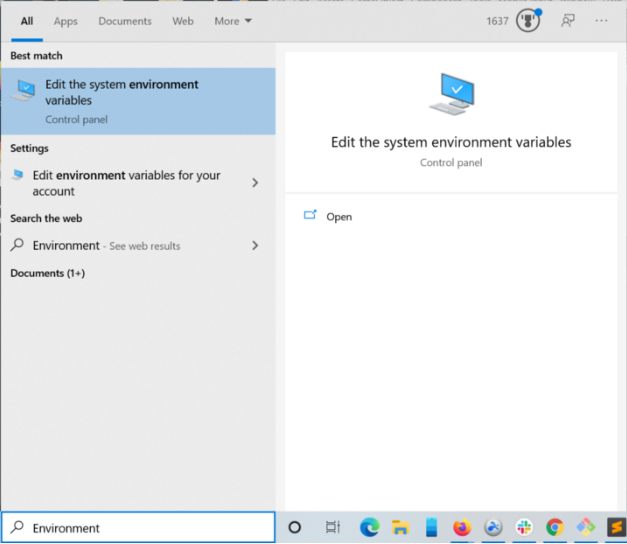
Search for Environment in the Windows search bar
Click Environment Variables button
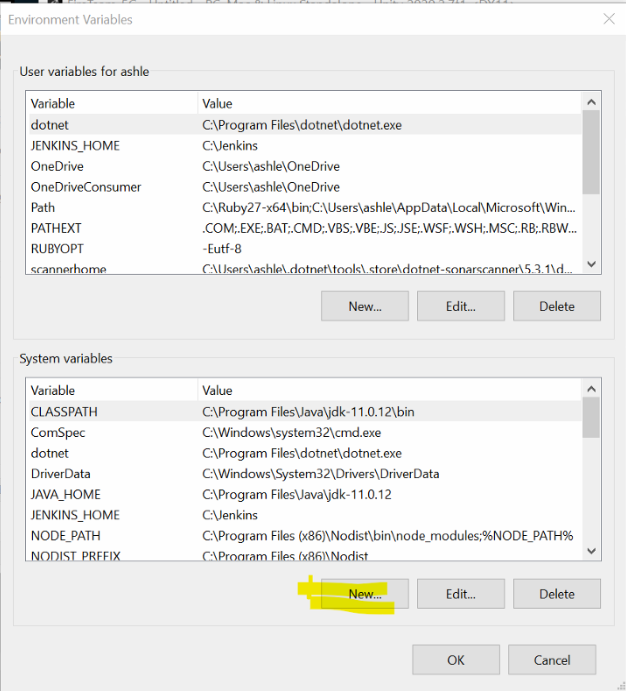
Select the New … button under System Variables
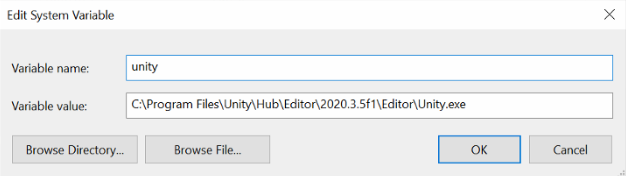
Give it a meaningful name and paste in the path to the Unity version you are using to build your game for the value. The reason why you are doing is so each build server can set it's own environment variable for the path to Unity, making this Jenkins file reusable.
If your new system variable isn't getting picked up by Jenkins you may just need to restart Jenkins. You can do so by going to http://localhost:8080/restart in your browser.
Variable 2: The Path to DotNet

Click the New… button again to create another System Variable.
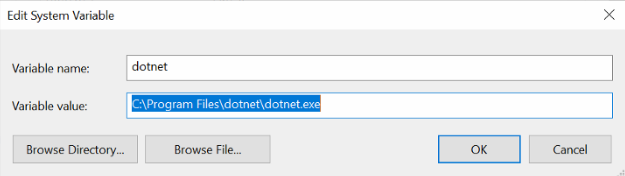
Give it a meaningful name and paste the path to dotnet.exe for the version of dotnet that you are using for your game in Unity.
You can see what dotnet version you are using in your Unity Game by opening it in Unity and selecting File-> Build Settings …
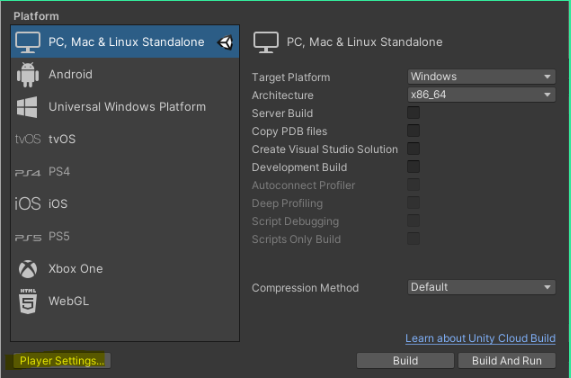
and in the Build Settings window select the Player Settings button.
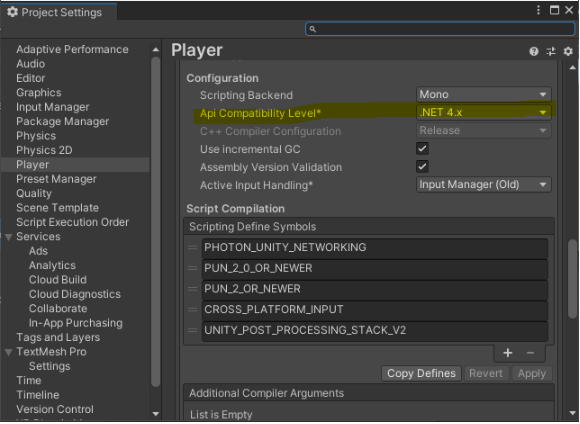
Scroll down until you see Api Compatibility Level* and there is your dotnet version.
For my tutorial I've made a small game that does nothing called the NothingGame.
You can open it in Unity Hub to detect what version of Unity it was built with, or else build your own and use whatever version of Unity you want.
The very first line of your Jenkins file is going to look like this:
UNITY_PATH = '%unity_nothing_game%' // create system environment var pointing to unity install pathand basically that's creating a Groovy variable from '%unity_nothing_game%'
Those % characters (pronounced 'modulo') are basically dereferencing a Windows system variable named 'unity_nothing_game', so we need to create that variable.
I tend to use system variables instead of hard-coding a path into the Jenkins file so that this Jenkins file is re-usable, and in theory another build server could have Unity installed wherever and still use this Jenkins file.
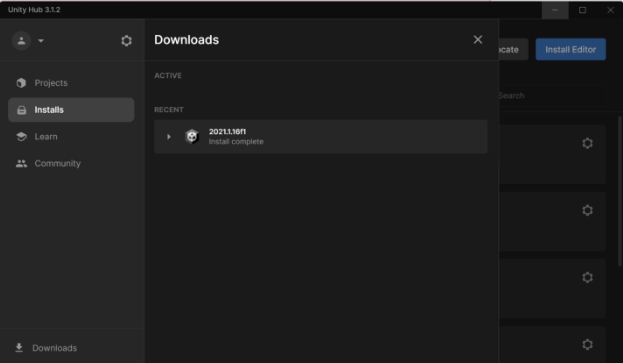
Open the NothingGame in Unity Hub:

You may see a warning like this:
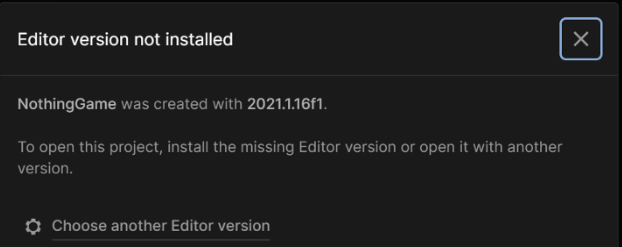
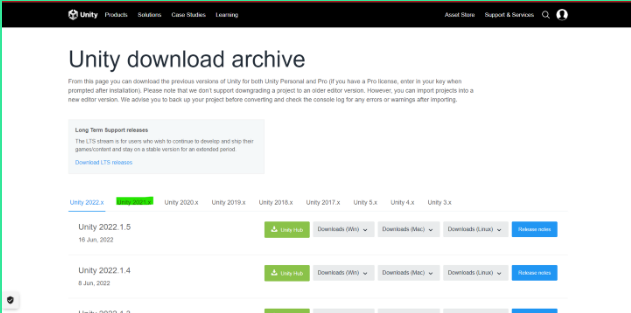
If you do, go to this page: Unity Download Archive [4]
Click the 2021.x tab
You can search for 16 to find this one:
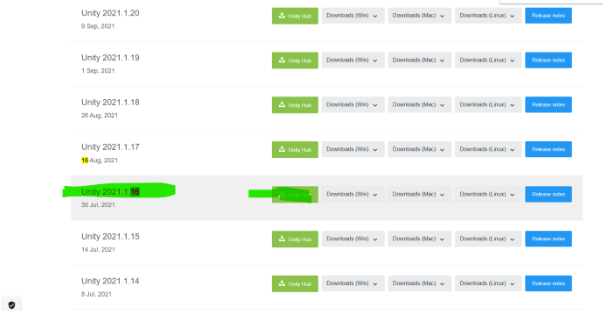
Don't worry about finding one with f1 at the end.
Click the green Unity Hub button. It should open up the correct install page in Unity Hub itself.
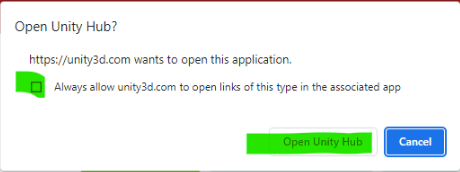
Allow your browser to open Unity Hub if you need to:
Note: you will need Visual Studio 2019 installed, you can see on my screen here it indicates I already have it installed.
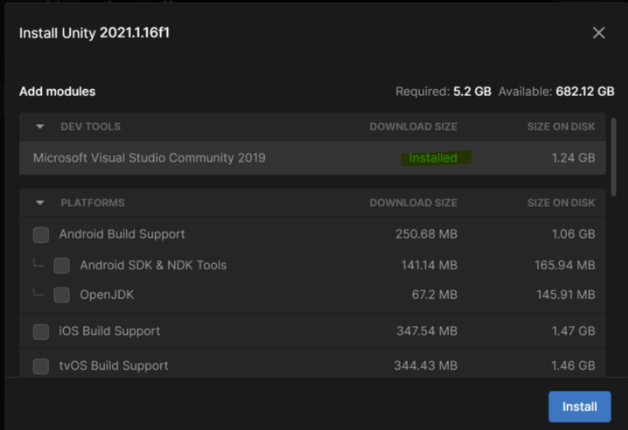
Make sure you have checked to install "Windows Build Support"
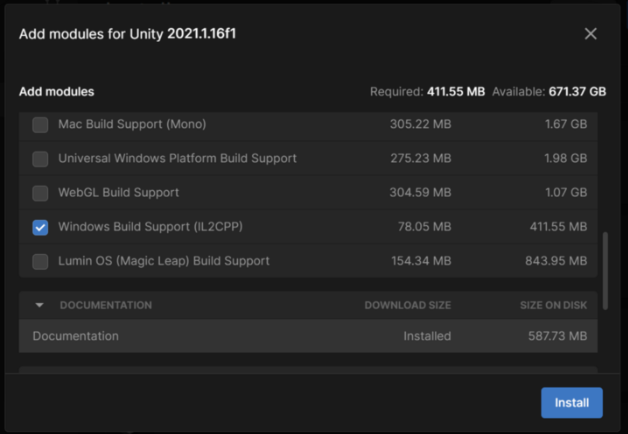
Click the blue install button and watch the progress bar:

Click the Environment Variables button
Click the "New" button iunder the System Variables table. We're about to create a new system variable.
My Unity is installed to this path:
C:\Program Files\Unity\Hub\Editor\2021.1.16f1\EditorYou are going to enter the path to the correct Unity.exe basically in this system variable "unity_nothing_game" if your folder doesn't have Unity.exe in it, it is not the correct folder:
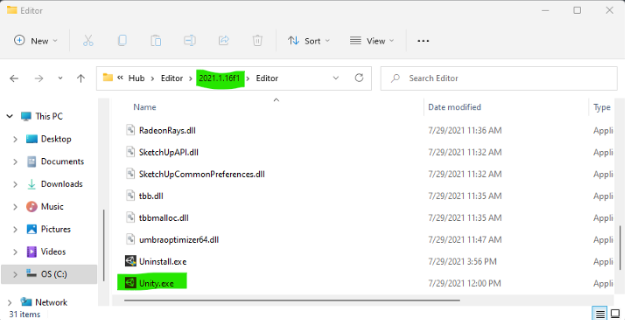
Enter that path in the text field:
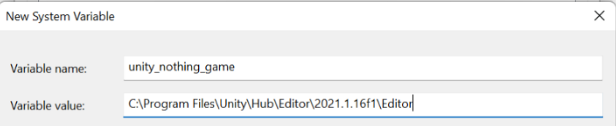
Append Unity.exe to the end of the path to make a complete path to the executable. This is convenient for calling Unity from the command line in the Jenkins file later. [not optional]

Make sure Unity.exe is at the end of the environment variable. We are going to call Unity.exe from the command line in our Jenkins file.
Step 4: Create a Jenkins file
Create a Jenkins file like this:
UNITY_PATH = '%unity_nothing_game%' // create system environment var pointing to unity install path

pipeline {
    parameters {
        choice(name: 'build', choices: ['Release', 'Debug'], description: "Release or Debug. Debug Builds take longer")
        choice(name: 'release', choices: ['alpha', 'beta', 'release'], description: "alpha - risky builds that may crash, beta - more mature builds testing before release release - builds ready for deployment to user")
    }

    agent any

    environment {
        appname = "NothingGame" // Set to your own game. "NothingGame: The game that does nothing!"
        release_name = "${ "${release}" == "alpha" || "${release}" == "beta" ? "${release}" : "" }"
        target = "${ "${build}" == "Release" ? "${appname}${release_name}.exe" : " ${appname}_Debug_${release_name}.exe" }" // append debug for debug builds, nothing for release builds
    }

    stages {
        stage ('Build') {
        steps { script {
            bat """
            \"${UNITY_PATH}\" -nographics -buildTarget Win64 -quit -batchmode -projectPath . -appname ${appname} -executeMethod Jenkins.CmdLine.parseCommandLineArgs ${build} -buildWindows64Player "${target}"
            """
        }}}

    } // end stages
}Inside Assets/Editor Create a C# script inside the Unity Editor.

Use this text:
#if UNITY_STANDALONE_WIN

using UnityEngine;
using System;
using UnityEditor;
using UnityEditor.Build.Reporting;
using System.Linq;
using System.Runtime.InteropServices;
using System.Collections;
using System.Collections.Generic;

/* Works with Unity version 2021.16f1 */

namespace Jenkins {

    public class CmdLine : MonoBehaviour
    {

        [DllImport("user32.dll", EntryPoint = "SetWindowText")]
        public static extern bool SetWindowText(System.IntPtr hwnd, System.String lpString);
        [DllImport("user32.dll", EntryPoint = "FindWindow")]
        public static extern System.IntPtr FindWindow(System.String className, System.String windowName);

        static BuildPlayerOptions buildPlayerOptions = new BuildPlayerOptions();

        public static void parseCommandLineArgs() {
            string programName = "NothingGame"; // hardcoded here, but can also be passed in with -appname argument

            string[] args = System.Environment.GetCommandLineArgs();
            int i = 0;

            foreach (string arg in args)
            {
                if (i > 0 && arg == "Release") {
                    buildPlayerOptions.options = BuildOptions.None;
                }
                if (i > 0 && arg == "Debug") {
                    buildPlayerOptions.options = BuildOptions.Development | BuildOptions.AllowDebugging | BuildOptions.EnableCodeCoverage | BuildOptions.EnableDeepProfilingSupport;
                    PlayerSettings.productName = PlayerSettings.productName + "_Debug";
                    programName = "_Debug.exe";
                    ChangeTitle(programName);

                    EditorUserBuildSettings.development = true;
                    EditorUserBuildSettings.allowDebugging = true;
                    EditorUserBuildSettings.connectProfiler = true;
                }
                if (i > 0 && arg == "-appname") {
                    programName = args[i+1];
                }
                i++;
            }
            BuildReport report = BuildPipeline.BuildPlayer(EnabledLevels(), programName, BuildTarget.StandaloneWindows, buildPlayerOptions.options);
            //BuildReport report = BuildPipeline.BuildPlayer(buildPlayerOptions);
            BuildSummary summary = report.summary;

            if(summary.result == BuildResult.Succeeded) {
                Debug.Log("Build Succeeded: " + summary.totalSize + " bytes");
            }

            if(summary.result == BuildResult.Failed) {
                Debug.Log("Build Failed");
            }
        }

        // Changes the title bar, often used to visually indicate a game is a debug build
        public static void ChangeTitle(string newTitle) {
            var windowPtr = FindWindow(null, newTitle);
            SetWindowText(windowPtr, newTitle);
        }

        private static string[] EnabledLevels() {
            List<string> scenes = new List<string>();
            foreach(EditorBuildSettingsScene scene in EditorBuildSettings.scenes) {
                if(scene.enabled) {
                    scenes.Add(scene.path);
                }
            }
            return scenes.ToArray();
        }

    }
}

#endif
Replace "NothingGame" with the name of your Unity game.
This will append "_debug" to the program name in the title bar, making it really obvious if you have shipped the debug build on accident and so on.
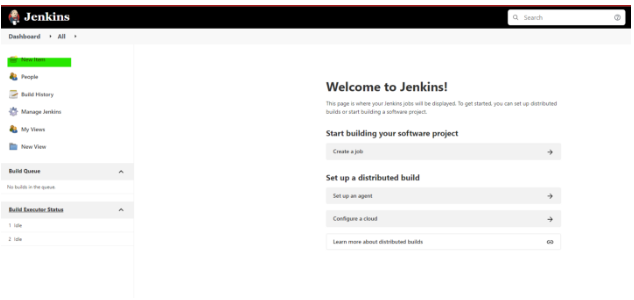
In the main dashboard (go to http://localhost:8080 if you get lost to go back to the main dashboard) and select "Manage Jenkins"
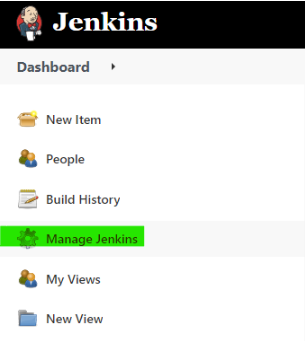
Select "Configure System"
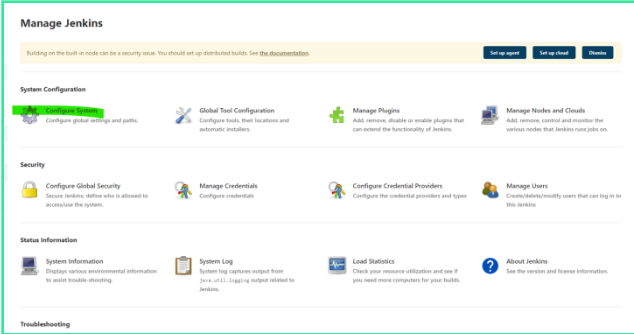
Scroll down to the section Labelled "Global properties" and check the box labelled "Environment Variables"
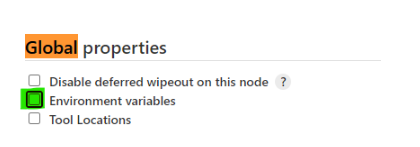
Click the Add button
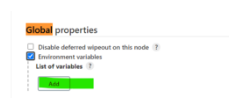
Add a variable with the name "unity_nothing_game" set to the value:
C:\Program Files\Unity\Hub\Editor\2021.1.16f1\Editoror wherever you had your Unity installed on your machine
Click the Save button at the bottom to accept.
![]()
Click the New Item button in the main dashboard to create your project
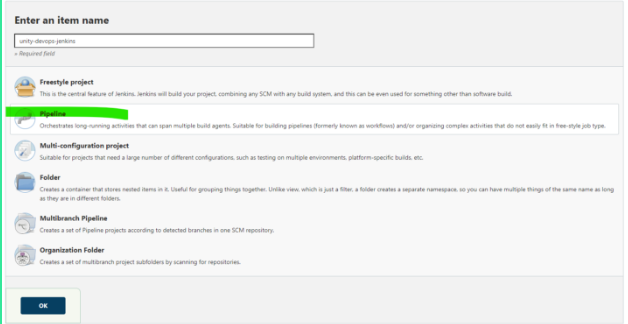
Give it a project name
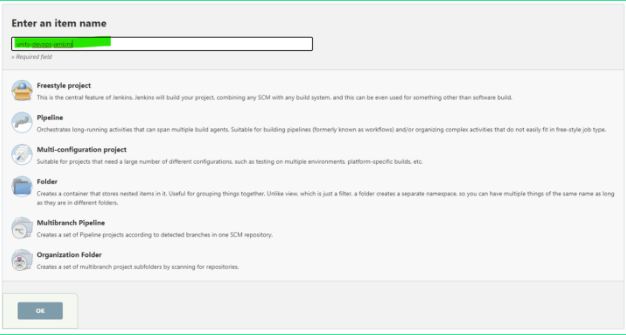
Select Pipeline for project type.
In the General Section (the first section) check the GitHub Project checkbox and enter the url of the Github project:

Basically use the same path you use when you do git clone to pull down the repo.

Scroll down the Build Triggers Section and Check the "Github hook trigger for GITScm Polling" checkbox. This basically just means that it will build every time you push to the branch that you have it set to watch.

Scroll down to the Pipeline Section.
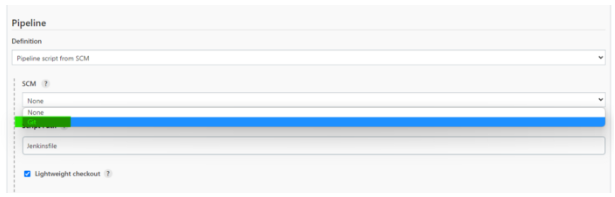
By default it will look like this:
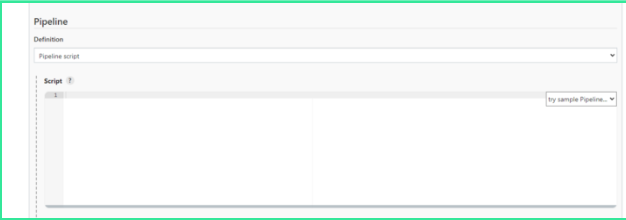
Use the ComboBox and switch from "Pipeline Script" to "Pipeline Script from SCM" SCM means source control management by the way.

Some new ComboBoxes will appear after that.
In the SCM ComboBox that appears select "Git" instead of None for SCM. You are saying that on Git there will be a "Pipeline Script"
For Repository URL paste in that https:// url to the github repo again
https://github.com/sitting-duck/unity-devops-jenkins.git

You can skip the "Credentials" section since this is a public repo.
By default the "Branch Specifier" is set to "master", change that to "main"

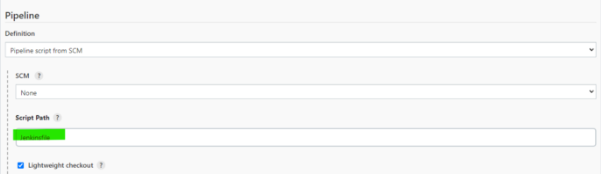
after your change it will look like this:

The next thing is "Script Path" and by default it just says Jenkinsfile. You can set the path to the Jenkinsfile here basically. Just leave it at the default, but if you needed to you could set a custom path like "deploy/Jenkinsfile" or have two Jenkinsfiles if you wanted and specify one build server to look for Jenkinsfile-win and the other to Jenkinsfile-mac and things like that if you wanted to.
Uncheck Lightweight Checkout
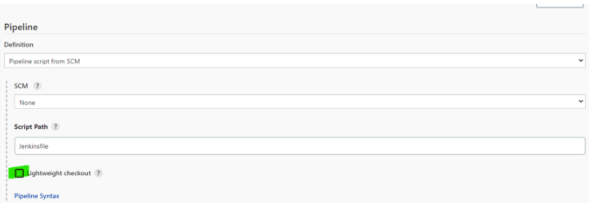
I haven't set anything with lightweight checkout in my git commits so you won't need that to checkout and build the NothingGame.
Click the Save button to accept these Settings.

Click the Build Now button
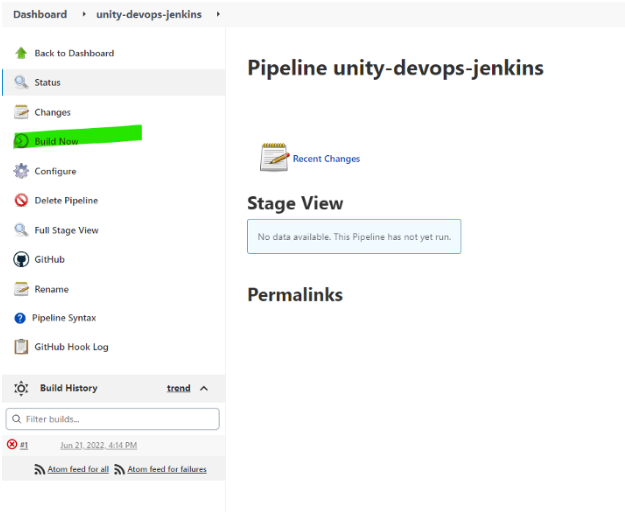
If it fails the first time with an error like this:
groovy.lang.MissingPropertyException: No such property: build for class: groovy.lang.Binding
That's just because the first time it parses the Jenkinsfile it will choke on the parameters the first time, but it will work every time after that.
Go ahead and build it again. You can see that the Build button says "Build with Parameters" now, so it will work with the parameters it finds in the Jenkinsfile now,
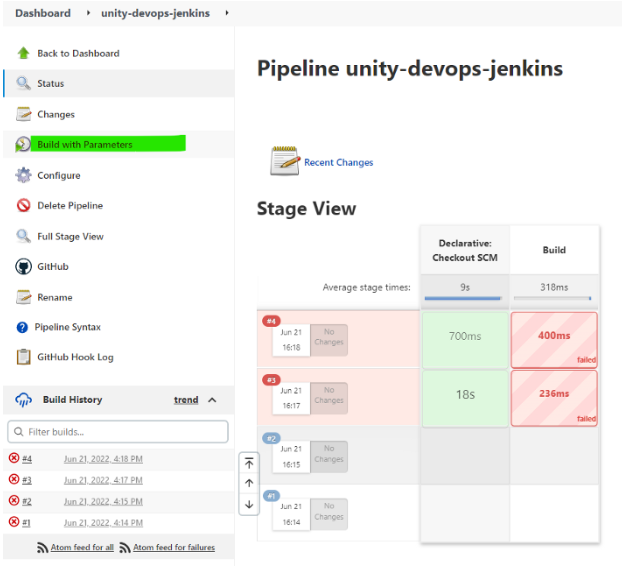
You can leave the default parameters and click the build button:

View the Console Output by using the Triangle Menu next to the timestamp for the latest build and selecting Console Output

Scroll past this section if you can build with no errors
DisplayProgressNotification: Build Failed
'' is an incorrect path for a scene file. BuildPlayer expects paths relative to the project folder.
Solution: Add scenes to build in the BuildSettings. BuildSettings had no scenes to build.

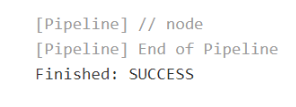
You should go into your Jenkins workspace for that project and check that your game executable is actually there and that it actually runs.
Jenkins will show you "Success" at the end of a build if the script did not throw any errors, but Jenkins is not intelligent enough to know if your game actually built the way that you wanted, so you must do some testing and verify.
Sometimes this can be misleading. Check your workspace and make sure your build artifacts are actually there
I can see my game is actually here in my workspace:
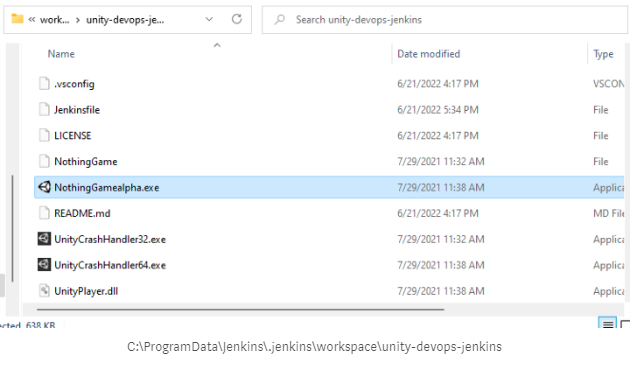
And I double click the game to make sure it actually launches.

And it does.
How to Jenkins Pipeline for Unity Game with SonarQube
https://ashley-tharp.medium.com/how-to-create-a-jenkins-pipeline-to-build-a-unity-game-on-windows-and-analyze-code-quality-on-build-1cda04ac7cbe
Installing SonarQube as a Service on Boot on Windows 10/11
https://ashley-tharp.medium.com/how-to-install-sonarqube-on-windows-11-7361a26ca042
Installing Jenkins on Windows 10/11
https://ashley-tharp.medium.com/how-to-setup-jenkins-on-windows-10-ac969ee921f2
[1] Generating and Using a Login Token in SonarQube. https://docs.sonarqube.org/latest/user-guide/user-token/
[2] DotNet 6.0 SDK Download Page Windows. https://dotnet.microsoft.com/en-us/download#windowsvs2015
[3] SonarScanner for MSBuild. https://docs.sonarqube.org/latest/analysis/scan/sonarscanner-for-msbuild/
[4] Unity Download Archive. https://unity3d.com/get-unity/download/archive