![]()
![]()
VoxDigest is a Next.js application designed to transcribe and summarize audio files using AI. It leverages Genkit with Google's Gemini models for AI-powered transcription, summarization, image generation, and quote generation.
- Upload .mp3 audio files.
- AI-powered transcription of audio content.
- Automatic AI-generated summary of the transcription, including:
- Key Concepts
- Important Quotes
- Key Facts
- "Latest on this Matter" (AI-generated context based on its knowledge)
- TL;DR Summary
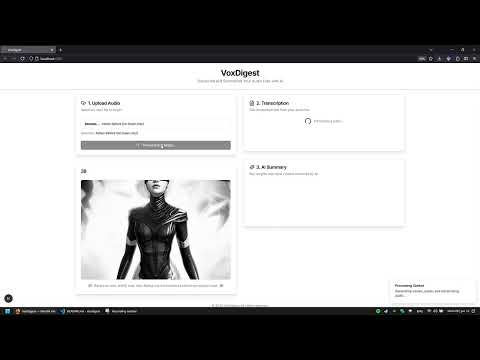
- Dynamic AI-generated visual inspiration (image) and a thought-provoking quote on each processing run.
- Downloadable summary and transcription in Markdown format.
- Next.js (App Router): React framework for building the user interface.
- React: JavaScript library for building user interfaces.
- TypeScript: Superset of JavaScript for type safety.
- Tailwind CSS: Utility-first CSS framework for styling.
- ShadCN UI: Re-usable UI components.
- Genkit (v1.x): Framework for building AI-powered applications.
- Google Gemini Models: Used for transcription, summarization, image, and quote generation.
Follow these instructions to get a copy of the project up and running on your local machine for development and testing purposes.
- Node.js (v18 or later recommended)
- npm (comes with Node.js)
- A Google Gemini API Key. You can obtain one from Google AI Studio.
-
Clone the repository: If you've cloned this project from GitHub or another source, navigate to the project directory.
git clone https://github.com/silrenan/voxdigest cd voxdigest -
Install dependencies: Install the necessary npm packages.
npm install
-
Set up your Environment Variables: You'll need to provide your Google Gemini API key. Create a new file named
.envin the root of your project directory.touch .env
Open the
.envfile and add your API key like this:GOOGLE_API_KEY=YOUR_GEMINI_API_KEY_HERE
Replace
YOUR_GEMINI_API_KEY_HEREwith your actual API key. API key currently can be obtained here.Important Security Note: The
.envfile contains sensitive information. Ensure that.envis listed in your.gitignorefile to prevent it from being committed to version control. A standard Next.js project usually includes this by default. -
Run the Development Servers: VoxDigest requires two development servers to be running concurrently:
- The Next.js development server for the frontend application.
- The Genkit development server for the AI flows.
Open two separate terminal windows or tabs in your project's root directory.
-
In the first terminal, start the Next.js app:
npm run dev
This will typically start the application on
http://localhost:9002. -
In the second terminal, start the Genkit development server: For development with auto-reloading on changes to AI flows:
npm run genkit:watch
Or, to just start it once:
npm run genkit:dev
The Genkit server will start, usually on a different port (e.g.,
http://localhost:3400), and output logs for your AI flows. The Next.js app communicates with this server.
-
Open the application: Once both servers are running, open your web browser and navigate to
http://localhost:9002(or the port indicated by thenpm run devcommand).
You should now be able to use VoxDigest locally!
- The user uploads an .mp3 file through the interface. (use ffmpeg for handle any convertion, if needed).
- The Next.js frontend converts the file to a data URI.
- When "Transcribe & Summarize" is clicked:
- A request is made to the
generateImageFlowto create a new visual. - A request is made to the
generateInspirationalQuoteFlowfor a new quote. - The audio data URI is sent to the
transcribeAudioFlowGenkit flow. - The Genkit flow uses a Gemini model to transcribe the audio to text.
- If transcription is successful, the resulting text is automatically sent to the
summarizeTranscriptionFlow. - This flow uses a Gemini model to generate a structured summary, including key concepts, quotes, facts, recent context ("Latest on this Matter"), and a TL;DR.
- A request is made to the
- The transcription and summary are displayed in the UI.
- The user can download the combined output as a Markdown file.
In the project directory, you can run:
npm run dev: Runs the Next.js app in development mode.npm run genkit:dev: Starts the Genkit development server.npm run genkit:watch: Starts the Genkit development server with file watching for AI flows.npm run build: Builds the Next.js app for production.npm run start: Starts a Next.js production server (after building).npm run lint: Lints the codebase using Next.js's default ESLint configuration.npm run typecheck: Runs TypeScript type checking.
Contributions are welcome! If you have suggestions or improvements, feel free to open an issue or submit a pull request.