
Butterfly is a tool for creating minutes. It has the following features.
- It transcribes the voice for each speaker and save it.
- You can copy the transcribed text to the clipboard or exported as CSV.
- The recorded data is also saved along with it.
- You can preview the audio from any location on the transcribed text.
preview_mini.mp4
macOS 10.15 or above.
iOS version is coming soon!
Use Firebase as your operating infrastructure. The environment must be prepared by the user. Therefore, prepare the following.
- Google account for Firebase registration.
- Install Firebase CLI.
Follow steps 1-3 in this article to get GoogleService-Info.plist.
- The project name can be anything.
- It doesn't use Google Analytics, so it can be enabled or disabled.
- Enter 'com.koalab.Butterfly' as the bundle ID when adding an iOS app. You do not need to enter your nickname and App Store ID.
- After downloading the plist file, click Next to skip the remaining steps.
Click "Authentication" from the left menu of the Firebase dashboard, and then click "Start" on the screen that appears.
Open the "Sign-in method" tab and open "Email / Password" from the provider to enable it. Leave the email link disabled.
Click "Firestore" from the left menu of the Firebase dashboard, and then click "Create Database" on the screen that appears.
Select "Start in production mode" and then select a location closest to your area.
Clone the source code with git or download it from "Release" and change to the project root directory in your terminal.
Then login to firebase.
firebase login
Finally, execute the following command and wait for it to complete. It may take a few minutes for the settings to take effect.
cd deploy
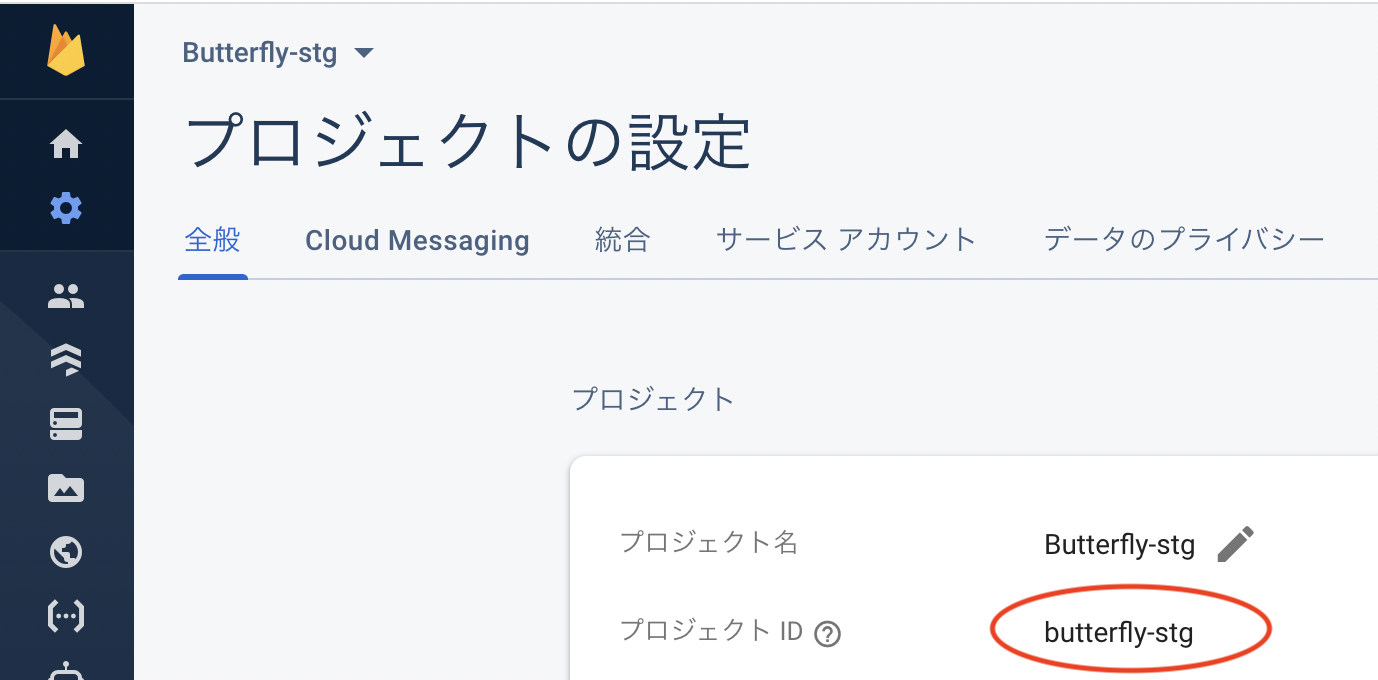
./deploy.sh your-project-id
*Please replace "your-project-id" as it appears on the project setting screen.
This completes the project settings. You can use it for a while with a free tier, but if you are about to exceed it, please register for a paid plan (Blaze). You can check the price here.
Please download the latest version from here.
Unzip the zip file and launch the app. Butterfly is a status bar resident app. It does not appear in the Dock.
*If you get a warning that the developer is unknown and cannot be opened, please allow execution from "Security & Privacy" in "System Preferences".
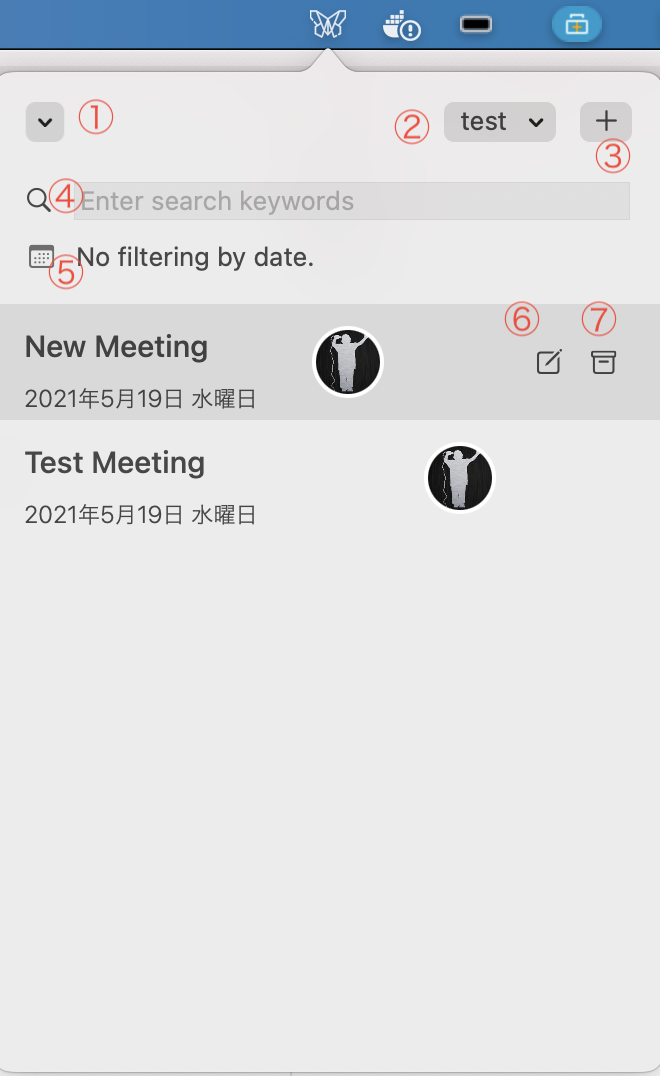
- Menu
- Switching workspaces
- Add new meeting
- Search by meeting titles
- Search by date
- Edit the meeting
- Archive the meeting *When archived, the data itself remains but is hidden from the list.
You can open the preferences screen from the menu.

- Icon image setting. Be sure to use a square image.
- User name. Press the pencil icon to enter edit mode. It will change to a check icon, so click it to save.
- Language setting. It be applied when transcribing using Apple's voice recognition engine.
- It is a function to acquire the voiceprint used for [speaker recognition](#Speaker recognition).
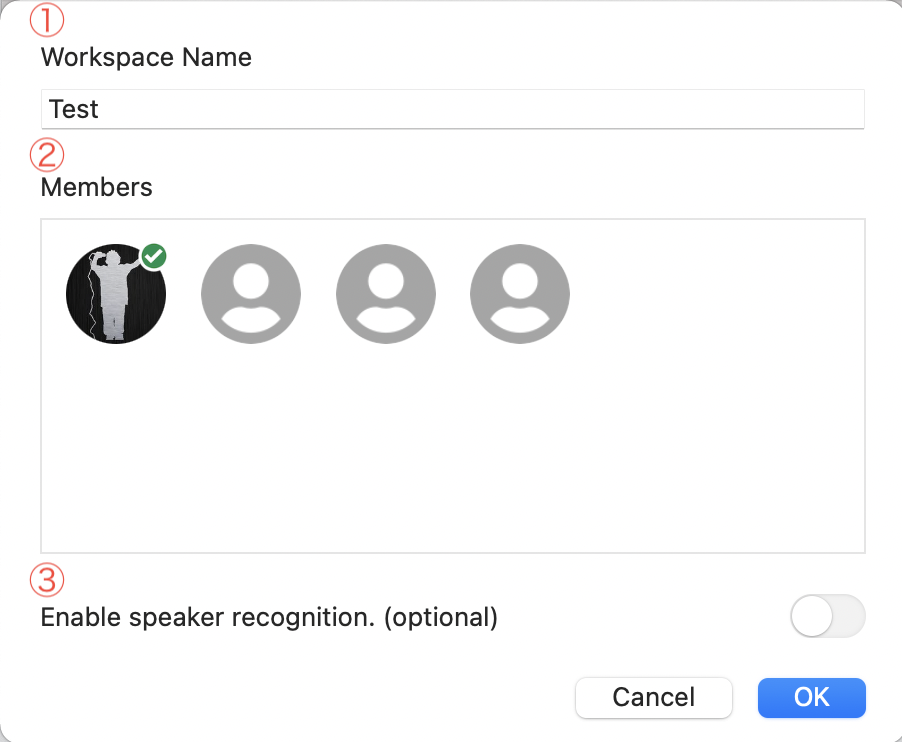
- Workspace name
- Selection of members belonging to the workspace. Only members selected here can attend meetings in the workspace.
- Enable / disable switch of [speaker recognition](#Speaker recognition).
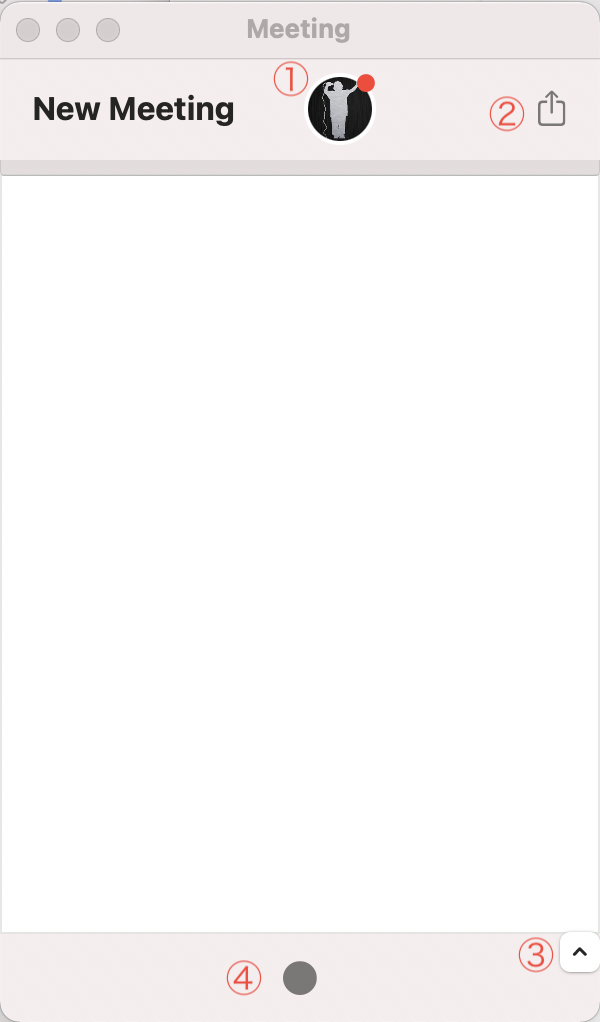
- The participants of the meeting are displayed. The user who has the meeting window open is marked with a red circle and only that user can accept microphone input. Since the microphones of each device are used, when the meeting is held with multiple people in the same room, a voice is picked up from the microphones and the transcribed content is duplicated. Therefore, under such circumstances, it is recommended to use the [speaker recognition](#Speaker recognition) function. Conversely, when meeting in separate locations, such as remote meetings, users who are far apart must always open a window to enable microphone input.
- It is a button to export the transcribed contents and the audio file.
- It is a button that opens and closes the list view of the transcribed contents.
- This is the meeting start button. When you start, transcription and recording will start. The user who presses the start button becomes the host, and only it can end the meeting. At the end, the recorded audio file from start to finish will be uploaded to Firebase storage. Therefore, be sure to remember that the host user terminates it.
This section describes optional functions to improve the accuracy of transcription.
When meeting with multiple people in the same room, one person should open the meeting window and use one microphone input to avoid duplicated transcription. However, since all input voice is recognized as the user of the device, it becomes impossible to determine who spoke. By using the speaker recognition function, it is possible to distinguish between them. To use the speaker recognition function, it is necessary to take the voiceprint of the users belongs to the workspace and create a speaker recognition model.
To create a speaker recognition model, use the "Create ML" app that comes with Xcode. Please install Xcode in advance.
Open the user settings from "Preferences" in the menu and click "Create voice print". When you press the start button, recording will start as it is, so whatever the content is, please continue talking for 20 seconds without interruption. When you press the start button, a 20 seconds countdown will start, and when it reaches 0, recording will stop and the recorded file will be automatically uploaded to the storage.
Please be aware of the following points to improve the accuracy of speaker recognition. In short, it is easier to improve the accuracy if there is no difference between the recording environment and the actual environment of the meeting.
- Record in the room where you often hold meetings.
- Record using the microphone you use all the time.
- Record with a natural voice when you are always speaking.
Follow the steps below to perform machine learning and create a speaker recognition model. You will need to recreate the model each time a voiceprint is added.
-
Open the workspace settings from Preferences in the menu, and enable "Enable speaker recognition" on the screen for adding or editing a workspace.
-
Click the "Export a learning data set" button to export the learning data to any location.
-
Launch Create ML via Xcode.
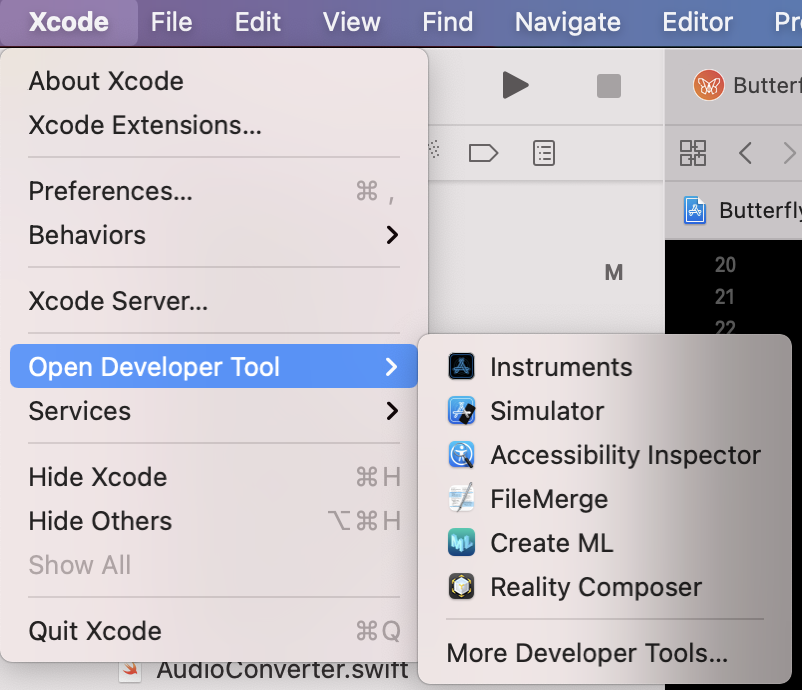
-
Create a project with "Sound Classification".
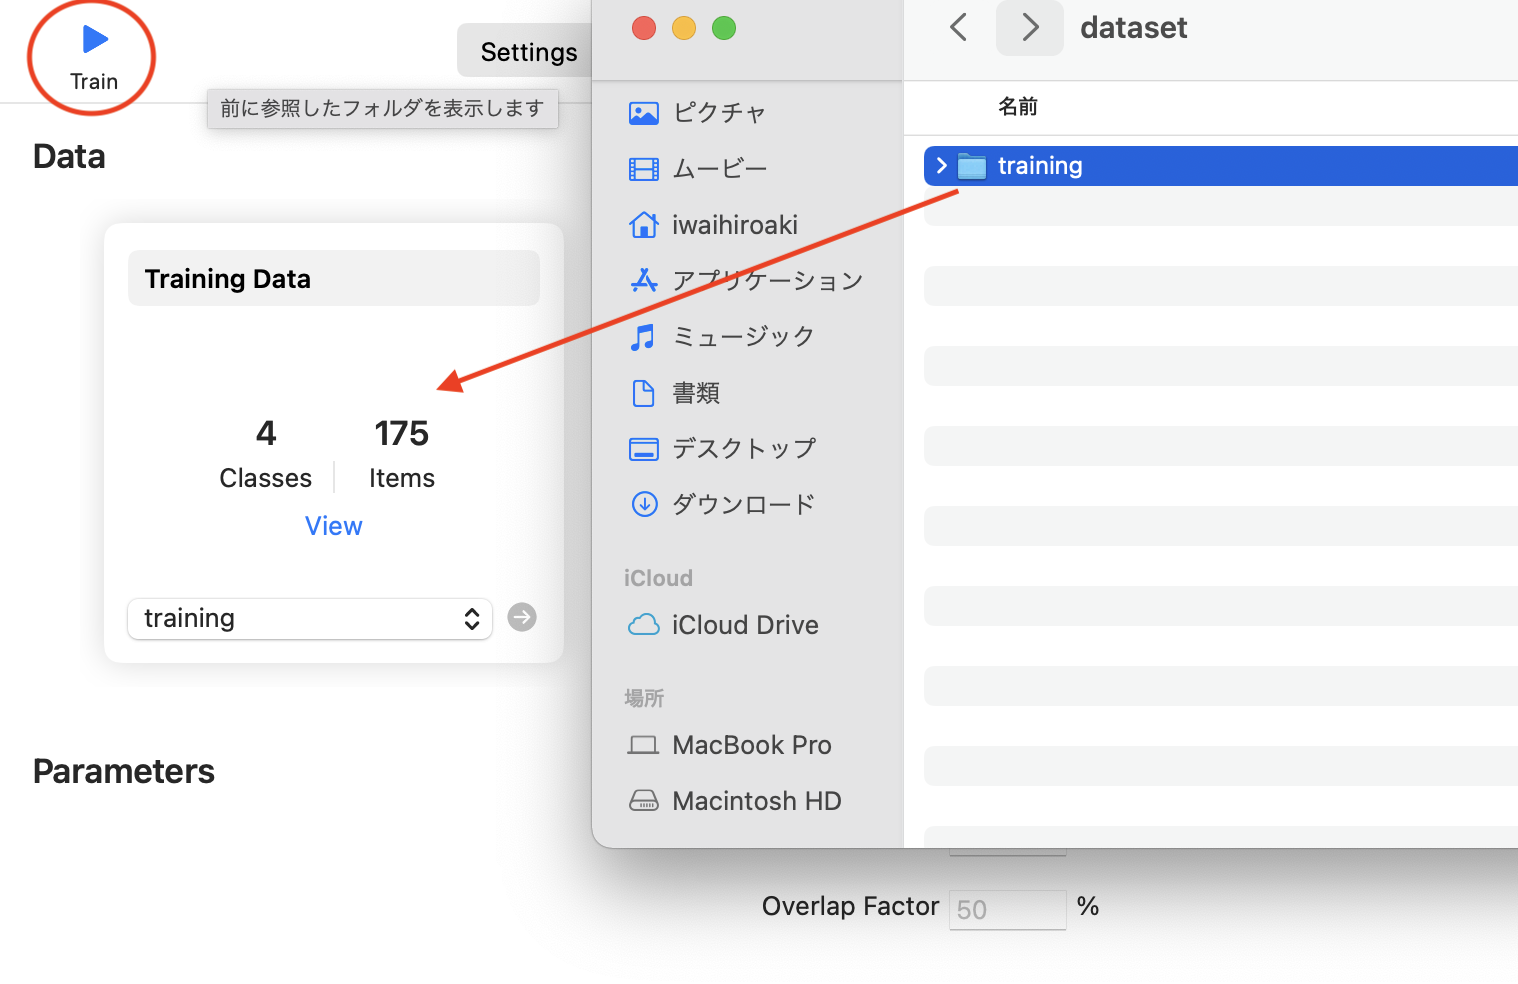
-
Drag the folder containing the learning audio file output in step 2 to the application window, click the "Train" button, and wait for a while until it is completed.
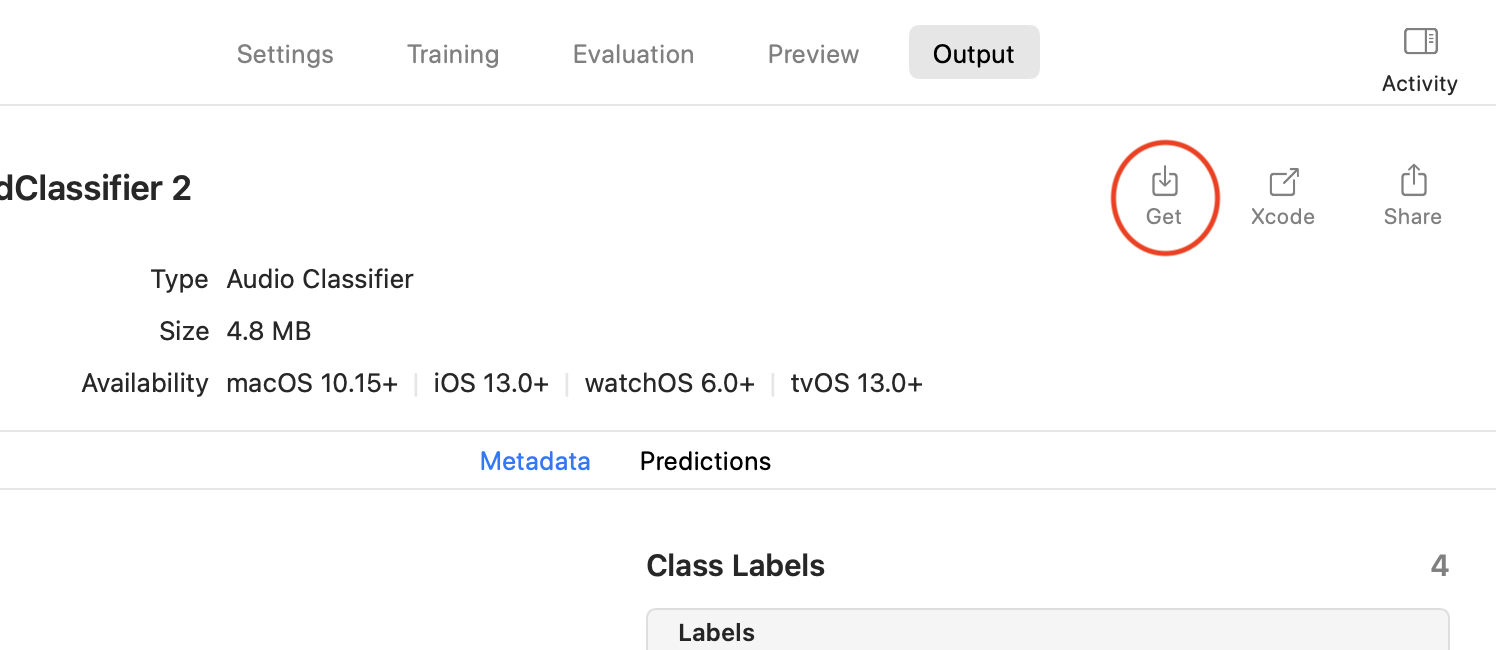
-
Open the "Output" tab and click the "Get" button to output the model file to any location.
-
Return to the workspace settings in Butterfly Preferences, open the workspace edit screen, click the "Upload ML File" button, and select the model file output in step 6. Click the OK button to upload the model file to the storage and complete the settings. When you start a meeting in the workspace, it will be transcribed with speaker recognition applied.
Butterfly is released under an MIT license.
See LICENSE for more information.
Please refer to the following for the license of the library used.