
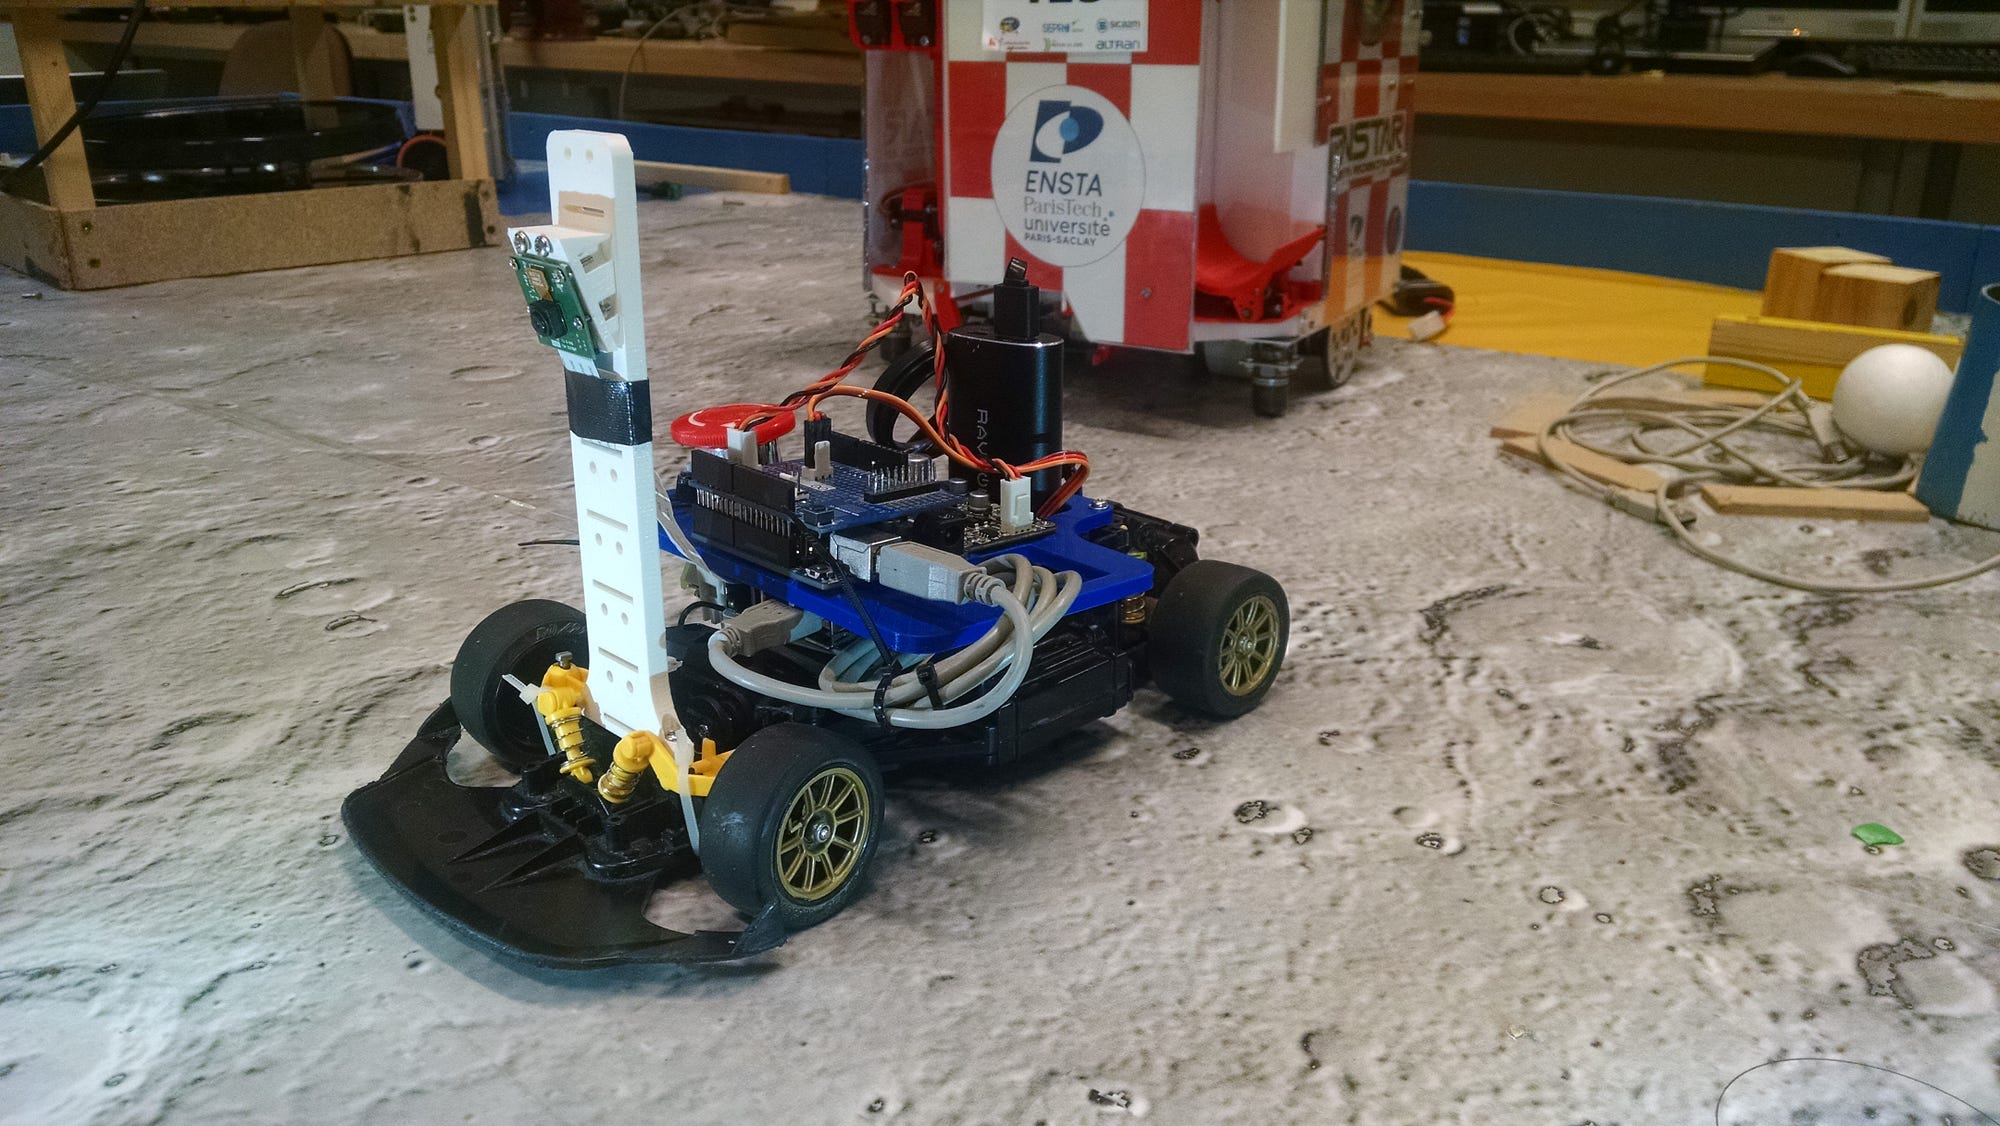
Autonomous toy racing car. CAMaleon team at the Toulouse Robot Race 2017. Humbavision team at IronCar. Medium article: https://medium.com/@araffin/autonomous-racing-robot-with-an-arduino-a-raspberry-pi-and-a-pi-camera-3e72819e1e63
Video of the car: https://www.youtube.com/watch?v=xhI71ZdSh6k
- Detailed Presentation
- 3D Models and Training Data
- How to run everything ?
- Autonomous mode
- Remote Control Mode
- How to train the line detector ?
- Installation
- Contributors
We wrote an article on medium that detailed our approach. You can read it here
En français: http://enstar.ensta-paristech.fr/blog/public/racing_car/
3D models (we used onshape.com):
Note: the Battery Holder was designed for this External Battery
We release the different videos taken with the on-board camera, along we the labeled data (the labels are in a pickle file) for IronCar and Toulouse Robot Race:
- Videos
- (outdated) Toulouse Dataset
- (outdated) IronCar Dataset
For installation, see section Installation.
- Compile and upload the code on the Arduino
cd arduino/
make
make upload
- Launch the main script on the Raspberry Pi, it will try to follow a line.
All useful constants can be found in
constants.py.
python main.py
- You need a computer in addition to the raspberry pi
- Create a Local Wifi Network (e.g. using create ap)
- Connect the raspberry pi to this network (Wifi on RPI)
- Launch teleoperation server (it will use the port 5556)
python -m teleop.teleop_server
- Launch teleoperation client on your computer (you have to edit the raspberry pi
IPinconstants.py)
python -m teleop.teleop_client
- Enjoy! You can now control the car with the keyboard.
- Record a video in the teleoperation mode:
python -m teleop.teleop_server -v my_video
- Convert the recorded video from h264 to mp4 using ffmpeg or MP4Box
MP4Box -add video.h264 video.mp4
- Split the video into a sequence of images
python -m train.split_video -i video.mp4 -o path/to/dataset/folder
-
Label the data using the labeling tool: https://github.com/araffin/graph-annotation-tool
-
Rename the json file that contains the labels to
labels.jsonand put it in the same folder of the dataset (folder with the images) -
Train the neural network (again please change the paths in the script)
python -m train.train -f path/to/dataset/folder
The best model (lowest error on the validation data) will be saved as cnn_model_tmp.pth.
- Test the trained neural network (you can use
-ioption to test it on a video)
python -m train.test -f path/to/dataset/folder -w cnn_model_tmp.pth
-
You need a 16GB micro sd card (warning, all data on that card will be overwritten) WARNING: for a smaller sd card, you need to resize the image before writing it (this link and repo may help)
-
Download the image here
Infos about the linux image: OS: Ubuntu MATE 16.04 for raspberry pi
Username: enstar
Password: enstar
Installed softwares:
- all the dependencies for that project (OpenCV >= 3, PyTorch, ...)
- the current project (in the folder RacingRobot/)
- ROS Kinetic
Camera and SSH are enabled.
- Identify the name of your sd card using:
fdisk -l
For instance, it gives:
/dev/mmcblk0p1            2048   131071   129024   63M  c W95 FAT32 (LBA)
/dev/mmcblk0p2          131072 30449663 30318592 14,5G 83 Linux
In that case, your sd card is named /dev/mmcblk0 (p1 and p2 stand for partition).
- Write the downloaded image on the sd card.
gunzip --stdout ubuntu_ros_racing_robot.img.gz | sudo dd bs=4M of=/dev/mmcblk0
- Enjoy!
The current project is located in
RacingRobot/.
If you want to back up an image of a raspberry pi:
sudo dd bs=4M if=/dev/mmcblk0 | gzip > ubuntu_ros_racing_robot.img.gz
Update your pi
sudo apt-get update
sudo apt-get upgrade
sudo rpi-update
Arduino + Arduino Makefile + rlwrap + screen
sudo apt-get install arduino-core arduino-mk rlwrap screen
- Arduino 1.0.5
- Arduino-Makefile
- OpenCV >= 3
- libserial-dev (apt-get)
- Python 2 or 3
OpenCV
- PreCompiled This is the recommended method
- Guide
Libserial (apt-get or compile from source)
# Boost
sudo apt-get install libboost-all-dev

# After libserial installation:
sudo ldconfig
All the required packages can be found in requirements.txt, install them using:
pip install -r requirements.txt
In short:
- PySerial
- TQDM (for progressbar)
- PyGame (for teleoperation)
- Enum support (for Python 2)
- ZeroMQ (for teleoperation)
- Pytorch (you have to compile it from source for the RPI)
- scikit-learn
pip install pyserial tqdm pygame enum34 scikit-learn
Note: for using the serial port, you need to change current user permissions:
# Add user to dialout group to have the right to write on the serial port
sudo usermod -a -G dialout $USER
# You need to logout/login again for that change to be taken into account
ZeroMQ (Message Passing with sockets) for remote control mode
sudo apt-get install libzmq3-dev
pip install pyzmq
or
git clone https://github.com/zeromq/libzmq/
./autogen.sh
./configure
make
sudo make install
sudo ldconfig
pip install pyzmq
Additional python dev-dependencies for training the neural network: On your laptop:
pip install pytorch
pip install torchvision

pip install sklearn # or sudo apt-get install python-sklearn
On the raspberry pi :
- You can try to use Python 2 wheel (not tested) that was created for this project:
- Download Python Wheel here
And then:
pip install torch-0.4.0a0+b23fa21-cp27-cp27mu-linux_armv7l.whl
Or follow this tutorial: PyTorch on the Raspberry Pi
-
Make sure you have at least 3 Go of Swap. (see link above)
-
(optional) Install a recent version of cmake + scikit-build + ninja
-
Install PyTorch
# don't forget to set the env variables:
export NO_CUDA=1
export NO_DISTRIBUTED=1
git clone --recursive https://github.com/pytorch/pytorch
sudo -EH python setup.py install
# torchvision is not used yet
sudo -H pip install torchvision
OpenCV with Anaconda, compiling from source:
cmake -DPYTHON_EXECUTABLE=/home/ỳour_name/anaconda3/bin/python3 \
-DPYTHON_INCLUDE=/home/ỳour_name/anaconda3/include \
-DPYTHON_LIBRARY=/home/ỳour_name/anaconda3/lib/libpython3.6m.so \
-DPYTHON_PACKAGES_PATH=/home/ỳour_name/anaconda3/lib/python3.6/site-packages \
-DPYTHON_NUMPY_INCLUDE_DIR=/home/ỳour_name/anaconda3/lib/python3.6/site-packages/core/include -DINSTALL_PYTHON_EXAMPLES=ON -DBUILD_TIFF=ON -DBUILD_opencv_java=OFF -DWITH_CUDA=OFF -DWITH_OPENGL=ON -DWITH_OPENCL=ON -DWITH_IPP=ON -DWITH_TBB=ON -DWITH_EIGEN=ON -DWITH_V4L=ON -DWITH_VTK=OFF -DBUILD_TESTS=OFF -DBUILD_PERF_TESTS=OFF -DCMAKE_BUILD_TYPE=RELEASE ..
- Sergio Nicolas Rodriguez Rodriguez
- Antonin Raffin