An enhanced MCP Server in Python implementing comprehensive weather tools with mock responses. It can be used as a scaffold for your own MCP Server or as a production-ready weather service.
- 🌡️ Current Weather: Get detailed current weather information including temperature, humidity, wind speed, and more
- 📅 Weather Forecast: Multi-day weather forecasts (up to 7 days) with high/low temperatures and conditions
⚠️ Weather Alerts: Mock weather alert system for severe weather notifications- 🔧 Server Information: Get server capabilities and configuration details
- 📊 Enhanced Logging: Comprehensive request logging and error handling
- ⚙️ Configurable: Environment-based configuration for temperature units, ports, and more
- 🧪 Testing: Included test suite for reliability
- 🐛 Debug Support: Compatible with MCP Inspector and Agent Builder
Prerequisites
To run the MCP Server in your local dev machine, you will need:
- Python
- (Optional - if you prefer uv) uv
- Python Debugger Extension
There are two approaches to set up the environment for this project. You can choose either one based on your preference.
Note: Reload VSCode or terminal to ensure the virtual environment python is used after creating the virtual environment.
| Approach | Steps |
|---|---|
Using uv |
1. Create virtual environment: uv venv 2. Run VSCode Command "Python: Select Interpreter" and select the python from created virtual environment 3. Install dependencies (include dev dependencies): uv pip install -r pyproject.toml --extra dev |
Using pip |
1. Create virtual environment: python -m venv .venv 2. Run VSCode Command "Python: Select Interpreter" and select the python from created virtual environment 3. Install dependencies (include dev dependencies): pip install -e .[dev] |
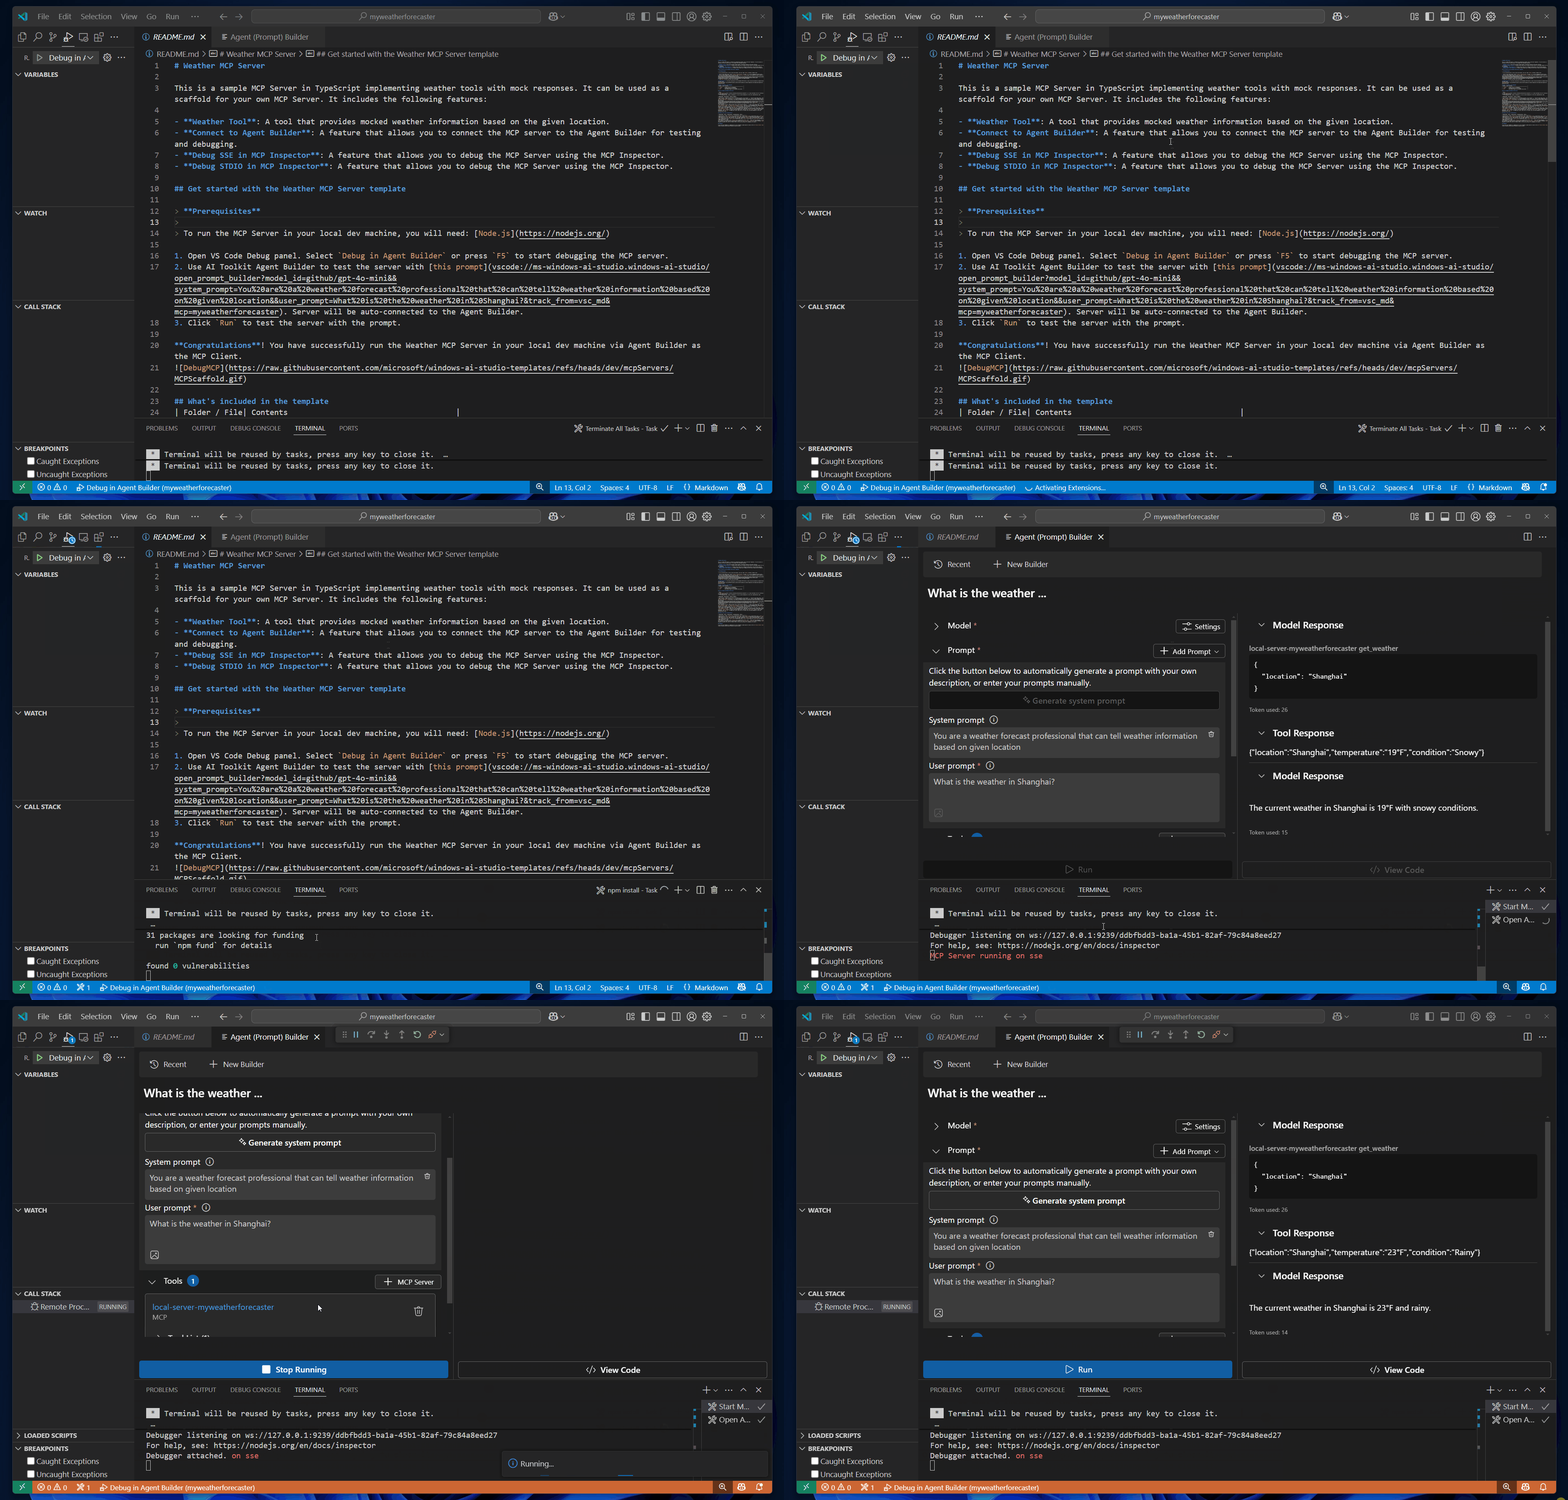
After setting up the environment, you can run the server in your local dev machine via Agent Builder as the MCP Client to get started:
- Open VS Code Debug panel. Select
Debug in Agent Builderor pressF5to start debugging the MCP server. - Use AI Toolkit Agent Builder to test the server with this prompt. Server will be auto-connected to the Agent Builder.
- Click
Runto test the server with the prompt.
Congratulations! You have successfully run the Weather MCP Server in your local dev machine via Agent Builder as the MCP Client.

| Folder / File | Contents |
|---|---|
.vscode |
VSCode files for debugging |
.aitk |
Configurations for AI Toolkit |
src |
The source code for the weather mcp server |
Notes:
- MCP Inspector is a visual developer tool for testing and debugging MCP servers.
- All debugging modes support breakpoints, so you can add breakpoints to the tool implementation code.
| Debug Mode | Description | Steps to debug |
|---|---|---|
| Agent Builder | Debug the MCP server in the Agent Builder via AI Toolkit. | 1. Open VS Code Debug panel. Select Debug in Agent Builder and press F5 to start debugging the MCP server.2. Use AI Toolkit Agent Builder to test the server with this prompt. Server will be auto-connected to the Agent Builder. 3. Click Run to test the server with the prompt. |
| MCP Inspector | Debug the MCP server using the MCP Inspector. | 1. Install Node.js 2. Set up Inspector: cd inspector && npm install 3. Open VS Code Debug panel. Select Debug SSE in Inspector (Edge) or Debug SSE in Inspector (Chrome). Press F5 to start debugging.4. When MCP Inspector launches in the browser, click the Connect button to connect this MCP server.5. Then you can List Tools, select a tool, input parameters, and Run Tool to debug your server code. |
| Debug Mode | Ports | Definitions | Customizations | Note |
|---|---|---|---|---|
| Agent Builder | 3001 | tasks.json | Edit launch.json, tasks.json, __init__.py, mcp.json to change above ports. | N/A |
| MCP Inspector | 3001 (Server); 5173 and 3000 (Inspector) | tasks.json | Edit launch.json, tasks.json, __init__.py, mcp.json to change above ports. | N/A |
If you have any feedback or suggestions for this template, please open an issue on the AI Toolkit GitHub repository