Use this library to help you create simple jQuery-based iParts for iMIS.
It will handle authentication for all your HTTP requests to the iMIS API from javascript based iParts, automatically adding on the RequestVerificationToken, from the DOM and correctly setting the path for your jQueryXHR requests.
To begin, create an index.html file and add the following HTML to the file:
<pre id="result">
  Hi World
</pre>
<!--This is the path to the jQuery interceptor plugin-->
<script src="https://cdn.jsdelivr.net/gh/Advsol/jQuery-interceptor/build/asi-interceptor.min.js" polyfill></script>

<script type="text/javascript">

jQuery( document ).ready(function() {
  // init the plugin, you only need to do this once per page.
  var myplugin = new jQuery.asiInterceptor();
    jQuery.get( "api/Party?id=113", function( data ) {
        jQuery( "pre[id='result']" ).html( JSON.stringify(data));
        alert( "We got data!");
    });

});
</script>
You can also obtain the demo file the Advsol/JQuery-interceptor article.
Next, save the file and upload it to your cloud storage/host.
For this example, it is added to the demo folder in the repo.
The sample iPart is located here: https://raw.githubusercontent.com/Advsol/jQuery-interceptor/master/demo/index.html
Do the following to configure the iPart in iMIS:
- Log into iMIS as a Staff user.
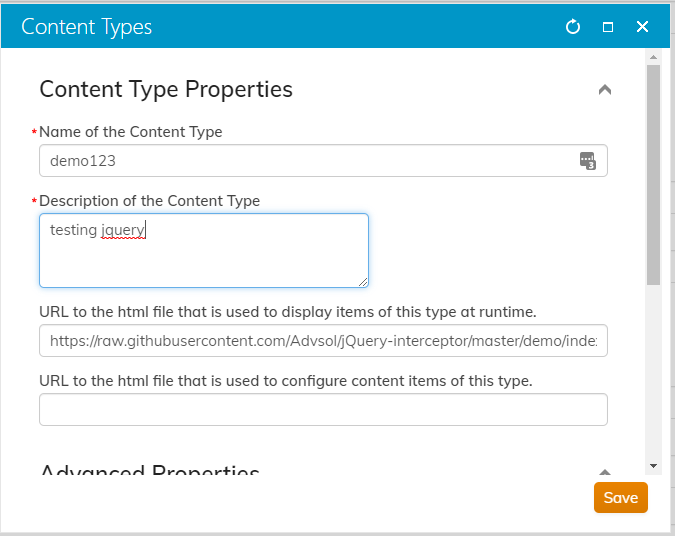
- Go to: RiSE > Maintenance > Content types.
- Click New > Content-Type.
- Select Client-based (preferred).
- Complete the required fields (Name, Description, and the first URL field). Use the URL to your iPart or the link to the sample iPart in the link above.
 -
-
- Save the iPart/Content Type.
Create a piece of content in RiSE and add your iPart to that content:
- As a staff user, go to: RiSE > Page Builder > Manage content.
- Click New > Website Content.
- Fill out the required fields and make sure to check Create navigation on publish:
- Select the location in the Navigation menu for your new content.
- Click Save & Publish.
After a short delay, your iPart navigation item and content are published. When you navigate to your new content, you will see an alert followed by the JSON returned by the API.
