An electronic thermostat for a Danfoss/Secop BD35F Compressor with ESP8266 (D1 Mini).
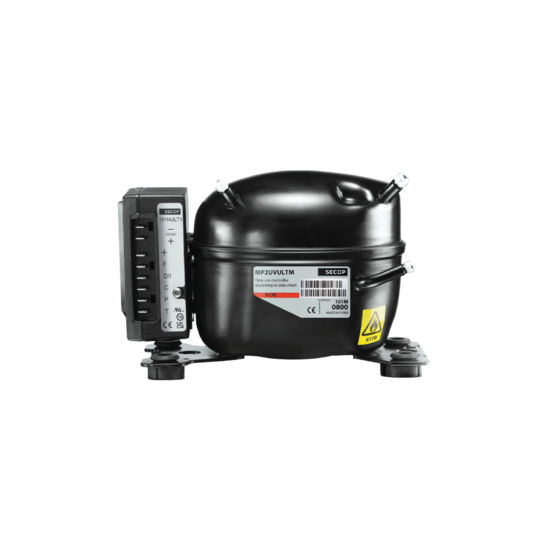
The Danfoss/Secop BD35F compressor is a widely used DC powered compressor. I'm using it on my boat to cool the fridge. Unfortunately, the original thermostat was defect. Therfore, I decided to create an electronic alternative that has more features than the standard mechanical one.
- Uses ESP8266 (D1 Mini) as processor.
- Dual language support (English/German).
- Easy upload of firmware without Arduino IDE possible.
- Temperature is measured with DS18B20 sensor.
- Implements a Two-Point with I controller to increase the accuracy.
- Supports variable compressor speeds (2000 - 3500 RPM) to adjust cooling capacity and power consumption.
- Supports Boost function to cool down with more power.
- Supports automatic or manual Defrost routine.
- WLAN support (AP or client mode). Configurable via Wifi Manager.
- Browser interface and MDNS support (http://fridgecontrol.local).
- All parameters are configurable with a browser and stored in flash memory of ESP8266.
- PCB layout is available in repository (KiCad) and can be orderd from Aisler.net.


The hardware is based on an ESP8266 (D1 Mini) and a few additional parts. The 5 Volt supply voltage for the D1 Mini is created with a step-down converter. The temperature is measuered with a DS18B20 sensor. The compressor is controlled with an open collector transistor between the connection T and C on the BD35F.
The BD35F is measuering the current between T and C. C is on GND level and T has a pull-up resistor to 5 Volt. Only a few milliampere are flowing. A small NPN transitor (BC337) is sufficient here. There are two options: T permanently on GND level means 2000 RPM speed. A PWM signal (5 KHz) with a defined duty-cycle is used to set speeds from 2000 to 3500 RPM.
The PCB has three connectors:
Connect +/-to 12 Volt to the J1 connector. There is a protection against wrong cabling for +/-.
Connect the three cables from the DS18B20 to the connector J2. The data line has already the pull-up resistor on the PCB. Red = VDD, Yello = D, Blue = GND. Place the Sensor in the Fridge in middle highth.
Connect J3 to the compressor connector. Remove the old thermostat cables and connect the cables C and T to the compressor. You need appropriate cable shoes for the connection.
There are two ways to install the software to the D1 Mini. Either you install the Arduino IDE or you direcly flash the BIN-file to the device.
Just download the IDE (version 2.x works well). Then add the Boad URL in preferences: "https://arduino.esp8266.com/stable/package_esp8266com_index.json" and install the Board software in the IDE. Then install the following libraries with the library manager:
- WiFiManager
- ArduinoJson
- OneWire
- DallasTemperature
- Preferences
Then download the sketch from GitHud (Button "Code" and download as ZIP) and extract it. Then move to the FridgeControl.ino file and open the sketch. Connect the D1 mini with an USB-Cable to the PC and upload the sketch to the D1 Mini. Later uploads can be done with the OTA function via network.
This works without installation of the IDE. Simply download the NodeMCU-PyFlasher and start it.

Select appropriate serial port and then move to the bin file in the deownloaded code. Use the seetings as shown for the upload.
After upload of the firmware you have to re-power the device to start the Wifi-Manager (within 2 minutes after restart). Just look for a new WLAN network with the name "Fridgeconfig_AP" and connect to it, without a password. The browser will start automatically. Then select the network (ssid) you want to connect to and enter the password.
If you don't configure or press "Exit" the device remain in AP mode with a changed name "Fridgecontrol_AP".
You can use this to test the device without a real network to connect to. But this is an open connection. Don't use this permanently.
To start the web interface enter "http://fridgecontrol.local" in the browser. The interface looks then like this:

The page shows the current fridge temperature, the average temperature, the desired set temperature. Duty cycle shows the percentage of the on time compared to the last on and off time cycle. The values are also shown in minutes (On/Off). The status filed shows the staus of the controller (Auto, On, Off, Boost or Defrost).
With the slidebar and +/- you can modify the the set temperature.
With the buttons you can set the mode:
- Auto: Standard mode to control the temperature.
- ON: Switch on the compressor permanently.
- Off: Switch off the compressor permanently.
- Boost: Cool down for a defined time with a different set point, hysteresis and speed.
- Defrost: Manually start a defrost cycle.
- Set: Opens a settings page.

With the settings page you can control the behaviour of the controller without a need to recompile the code. The following settings are available:
- Language: 0=English 1=German language
- Hysteresis: Sets the Hysteresis/deviation for the two point controller. 2 means +/- 2 K. For a set temperature of 6 that means the temperature will between 4 and 8 degrees.
- RPM: The desired speed of the compressor. Set as low as possible to reduce power consumption (2000 = 3,5A, 3500 = 7A). "0" means T permanently to GND and 2000 RPM (original mechanical thermostat behaviour).
- AVG Error: This is the allowed deviation from the average. 0 means the compressor will cool down in every cycle until the average temperature reaches the set temperature. The average temperature is calculated with a low pass filter with K of 1/3600. Means average over about one hour.
- Max High: The maximum high temperture. The compressor will be switched off, if ths level is reached. Independent of average temperature.
- Max Low: The maximum low temperture. The compressor will be switched on, if ths level is reached. Independent of average temperature.
- Boost Temp.: Desired temperature for the boost function.
- Boost Hyst.: Hysteresis/deviation for the boost function.
- Boost Time Time in minutes for the boost function.
- Boost RPM: Compressor speed for the boost function.
- Max Runtime: Used to detect a needed defrost cycle. If the compressor runs for the defined time, a mandatory defrost cycle will start.
- Defrost Time: Set the time for the defrost cycle. Time depends on local fridge details.
After changes press the "Set" butten. The entered value will be checked against the allowed ranges. If everyting is OK you can use "Back" to go back to the main page.